
When you’re planning a home sauna, it’s easy to picture where the benches will go before you’ve worked out how they’ll feel. A bench that looks generous on a floor plan may leave your feet in a cooler part of the room, crowd the heater or make the step up awkward. Its position needs to work with the finished ceiling height, the heater and the people who will use the sauna most often.
Start your sauna bench design with the way you want to use the space. If you like to stretch out, you’ll need more depth and uninterrupted length than you would for upright seating. If several people will use the sauna together, the layout should give them room to sit comfortably while keeping a clear path from the door.
Once you know what matters most to you, you can set the upper bench height, work out the foot level and compare layouts against your room measurements. The dimensions and checks below will help you turn that plan into benches that feel comfortable and fit the room.
Start With Heat, Headroom and the Heater
Hot air rises, so the upper bench is the main comfort zone. If it sits too low, your head may be warm while your feet stay in a cooler layer. If it sits too close to the ceiling, taller bathers may feel cramped. Work down from the ceiling instead of choosing a fixed bench height from the floor.
A practical planning range is about 100 to 120 cm (39 to 47 inches) from the upper bench surface to the ceiling. That leaves seated headroom while keeping bathers in the upper heat zone. Test the range with the tallest regular user sitting upright. Remember that a backrest can move the user forward and slightly change the space needed.
Next, compare the bench levels with the heater. As a traditional rule of thumb, the foot bench should be at or above the top of the stones so your feet remain in the warmer zone. Treat that as a planning principle rather than a substitute for the heater manual. Heater type, stone height and airflow all influence the result.
Place the exact heater model on your scaled plan before finalizing the benches. Its installation manual controls minimum clearances, guard requirements and any rules for recessing the unit. If you have not selected the heater, reserve extra space. You can narrow the plan later; recovering clearance after framing is much harder.
Choose Bench Height and Depth for How You Sit
Once the upper level is set, work downward through the foot bench and step. A common interval between the upper seat and foot bench is 40 to 45 cm (16 to 18 inches). Steps often use a lower rise, around 30 to 35 cm (12 to 14 inches). These are starting ranges, not universal requirements.
Depth should reflect how you actually use the sauna. A narrow bench may be adequate for upright sitting, but it gives you less room to turn sideways, bring your feet up or lie down. A deep bench is more flexible, though it can consume valuable floor area and may leave shorter bathers without comfortable back support.
| Bench element | Useful planning range | What to check in your room |
|---|---|---|
| Upper bench to ceiling | 100–120 cm (39–47 in) | Seated headroom for your tallest regular user |
| Upper bench depth | At least 50 cm (20 in); 60 cm (24 in) or more for reclining | Whether you sit upright, bring your feet up or lie down |
| Space per seated person | About 60 cm (24 in) of bench length | Realistic everyday capacity, not occasional maximums |
| Upper bench to foot bench | 40–45 cm (16–18 in) | Comfortable leg position and warm foot level |
| Step rise | About 30–35 cm (12–14 in) | Safe, comfortable access for everyone who will use it |
Mock up the upper bench before committing. A board, sturdy box or taped outline can help you test seat depth, legroom and the reach to a backrest. Include the finished bench thickness and backrest projection. If lying down matters, plan enough uninterrupted length for the intended user.
Our current standard cedar bench depths are 20 inches for the top and 16 inches for the bottom. Those sizes suit many compact two-tier layouts, while custom framing and L-shaped options can accommodate different rooms and preferences. Confirm the final dimensions against your own plan before requesting a quote.
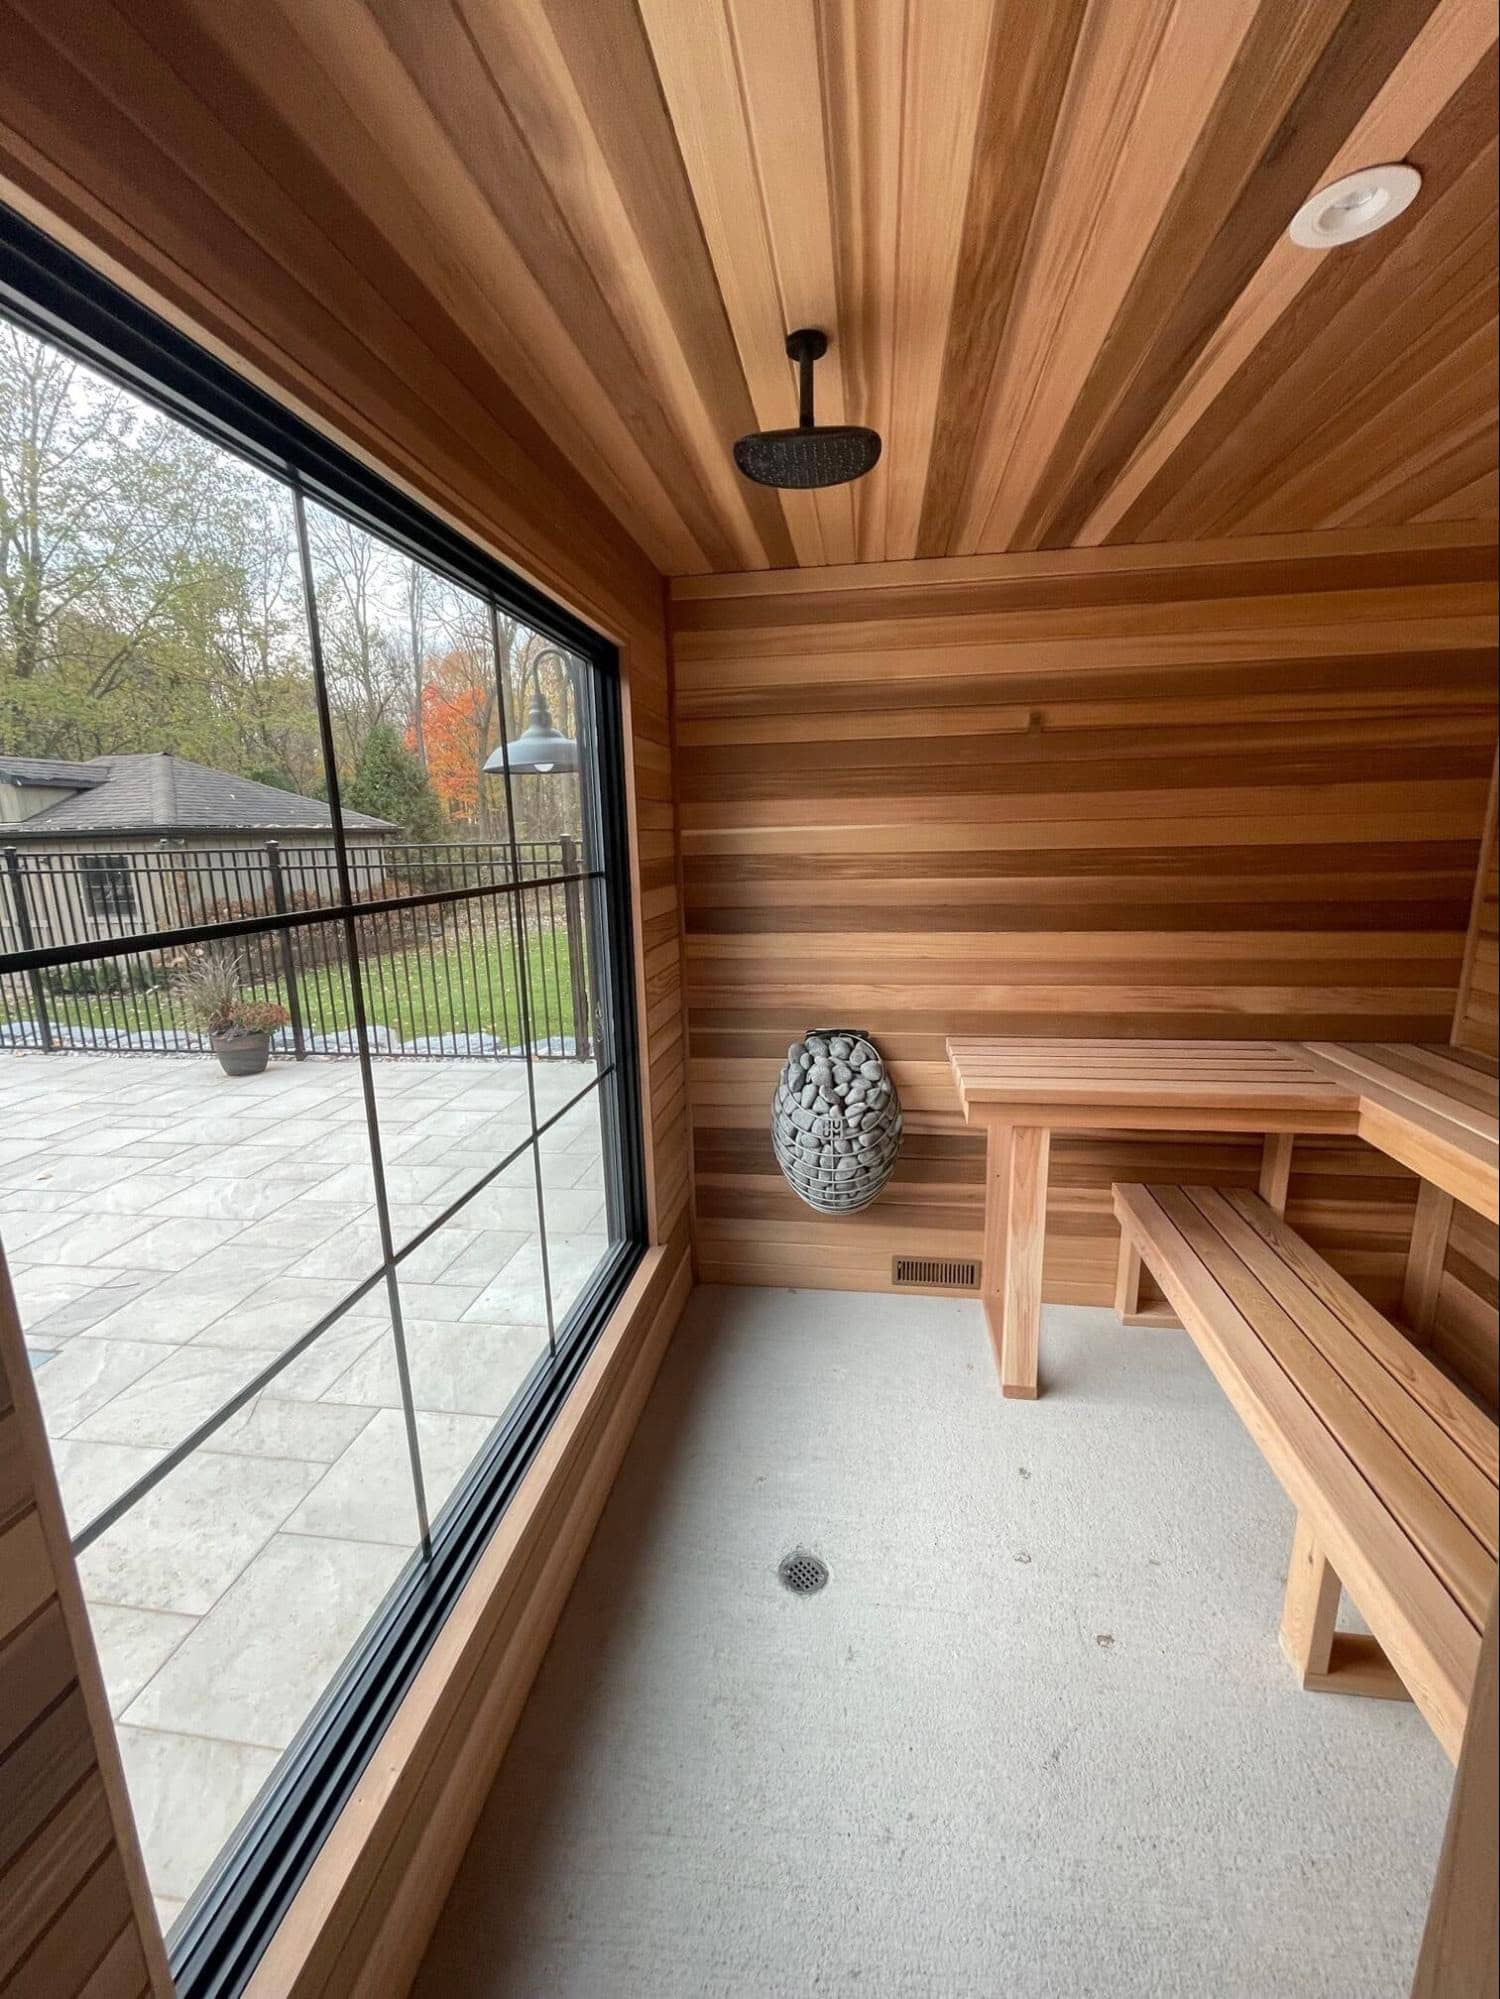
Pick a Layout That Matches the Room
The most attractive layout on paper is not always the most comfortable one in a finished sauna. Start with the number of people who will use the room most often, then choose the simplest arrangement that serves them well.
A straight two-tier bench is often the strongest choice for a small room. It concentrates usable seating along one wall, leaves a clear path from the door and reduces awkward corners. It can also provide a long uninterrupted upper level for reclining if the wall is long enough.
An L-shaped layout adds social seating and uses an adjacent wall, but the corner does not deliver the same usable capacity as two separate straight runs. Check how knees, feet and shoulders meet at the turn. It works best when the added leg does not squeeze the entrance, heater zone or step path.
Opposing benches can make a larger sauna feel conversational and balanced. They demand more width because both sides need useful seat depth plus shared legroom. If the heater sits between them, its clearances and guard reduce the space further. Plan roughly 2,200 mm as a minimum room width for opposing upper benches, with about 2,500 mm providing more legroom; your heater manual and local requirements still take priority.
U-shaped layouts offer many seating positions but can quickly become crowded. Use one only when all three runs remain genuinely useful. In many home saunas, one generous upper bench creates a better daily experience than several shallow surfaces designed around a once-a-year maximum crowd.
Check Movement, Structure and Airflow Before Building
A bench plan must work as part of the whole sauna. Review it at full scale with the door swing, heater, steps and ventilation shown. Walking through the layout now can prevent expensive rework later.
Before you approve the drawing, check each of these points:
- Follow the heater manufacturer’s stated clearances to benches, walls, guards and other combustible materials. Do not estimate them from a photo or a different model.
- Keep the route from the door to the steps clear. A bather should not have to squeeze past the heater or step over an obstacle.
- Plan secure supports before the wall finish goes on. Wall-mounted benches need framing or support positioned for the expected load; floating designs may require additional material beyond a standard bench package.
- Leave room for air to circulate and for the ventilation system to work as designed. Do not cover an inlet or exhaust with a fascia, step or stored item.
- Make surfaces reachable for cleaning and drying. Removable sections or open space below the bench can make regular care much easier.
- Test step heights and handholds for every regular user, especially children, older adults or anyone with limited mobility.
- Confirm the finished bench thickness, backrest and guard dimensions before marking support heights.
Coordinate the bench plan with your sauna heater selection. Changing from a compact wall unit to a taller floor model can alter clearances, the foot-bench relationship and the safest route. Check the final heater manual, applicable electrical or chimney requirements, and local building rules before installation.

Turn the Plan Into a Buildable Bench
With the main geometry settled, create a dimensioned drawing. Show the finished room width, length and ceiling height; bench surfaces; heater footprint and clearances; door swing; steps; guards; supports; ventilation; and cleaning access. Dimension from finished surfaces so panelling and trim do not consume your planned space.
Treat the bench as both furniture and structure. The top should feel smooth against bare skin, the frame should limit movement, and the assembly should tolerate repeated heating and drying. Use sauna-appropriate lumber and corrosion-resistant fasteners specified for the system. Avoid unverified coatings on hot surfaces or areas that contact skin.
If you are building with a prepared cedar package, confirm exactly what it includes. Our current bench package includes 2×4 cedar planks for the bench tops, fascia, crosspieces and galvanized assembly screws. Bench frames are priced separately, and a floating installation requires additional hanger material. We specify two frames for benches up to five feet and three frames for lengths of six feet and over. Verify these details and your final cut dimensions when requesting a quote because the room, layout and support method still determine the finished build.
Plan Your Sauna Benches With Home Sauna Kits
Your best bench layout is the one that fits your room, heater and habits at the same time. We can help you compare the practical trade-offs before you commit to materials: a deeper upper bench for reclining, a compact straight layout for a smaller room, or an L-shaped arrangement that gives family and friends more ways to sit together.
Bring us your finished room dimensions, ceiling height, door location, preferred heater and expected number of bathers. We can help you match those details with cedar bench materials, framing options and the rest of your sauna plan. Our standard two-tier bench sizes provide a useful baseline, while custom framing can address spaces that need a different approach.
We also recommend deciding on the heater and benches together. That makes it easier to protect required clearances, place the foot level sensibly and keep the entry path comfortable. With the main choices coordinated early, your installation can move forward with fewer compromises and less rework.
At Home Sauna Kits, we help you turn a measured bench plan into a comfortable, buildable sauna using components selected to work together.