Imagine transforming your basement into a serene haven where you can unwind and recharge. A DIY basement sauna offers this slice of tranquility right at home, providing a much-needed escape from the daily grind and even enhancing your property’s appeal. This welcoming retreat is not only a touch of luxury but also an investment in your well-being.
Building your own sauna may seem like a big task, but breaking it down into manageable steps makes it achievable and rewarding. Whether you envision the timeless ambiance of a traditional sauna or the modern practicality of an infrared version, this guide will help you turn your basement into a personalized wellness retreat. Embrace the comfort and benefits of a sauna every day without leaving your house.
Tools and Materials You’ll Need
Before you begin constructing your basement sauna, it’s vital to gather all the necessary tools and materials to streamline the installation process.
Tools
- Power Drill and Screwdrivers. Essential for assembling and securely fastening all sauna components.
- Tape Measure. Used for making sure precise measurements during setup to verify all elements align correctly.
- Air Nailer (or aHammer). Needed for framing and securing T&G boards directly to the stud. Use stainless steel brad nails, galvanized finishing nails or stainless steel wood staples.
- Level. Ensures even and aligned surfaces, essential for the structural integrity of the sauna. Required to install a pre-hung door to ensure accuracy.
- Miter & Table Saw. Used for cutting wood or panel adjustments. A final trim is required for all T&G pieces for a perfect fit. The top and bottom pieces of each wall will need a clean rip.
- Stud Finder. Helps locate existing wall studs in the basement for possible frame attachment points. This will be useful after the T&G is installed.
- Insulation Knife. For cutting thermal insulation sheets to precise sizes.
Materials
- Fibreglass Insulation. High-quality insulation to minimize heat loss and optimize temperature maintenance. Ensure you use the mineral wool style to avoid shrinkage.
- Cedar T&G Panels. Used for constructing walls and ceilings, providing durability and a pleasant aroma.
- Sauna Heater. Choose between electric or infrared heaters to match heat distribution preferences.
- Sauna Door. Preferably made of tempered glass or wood, it is designed to fit seamlessly with the sauna frame. Sauna doors are shorter than typical doors to mitigate heat loss.
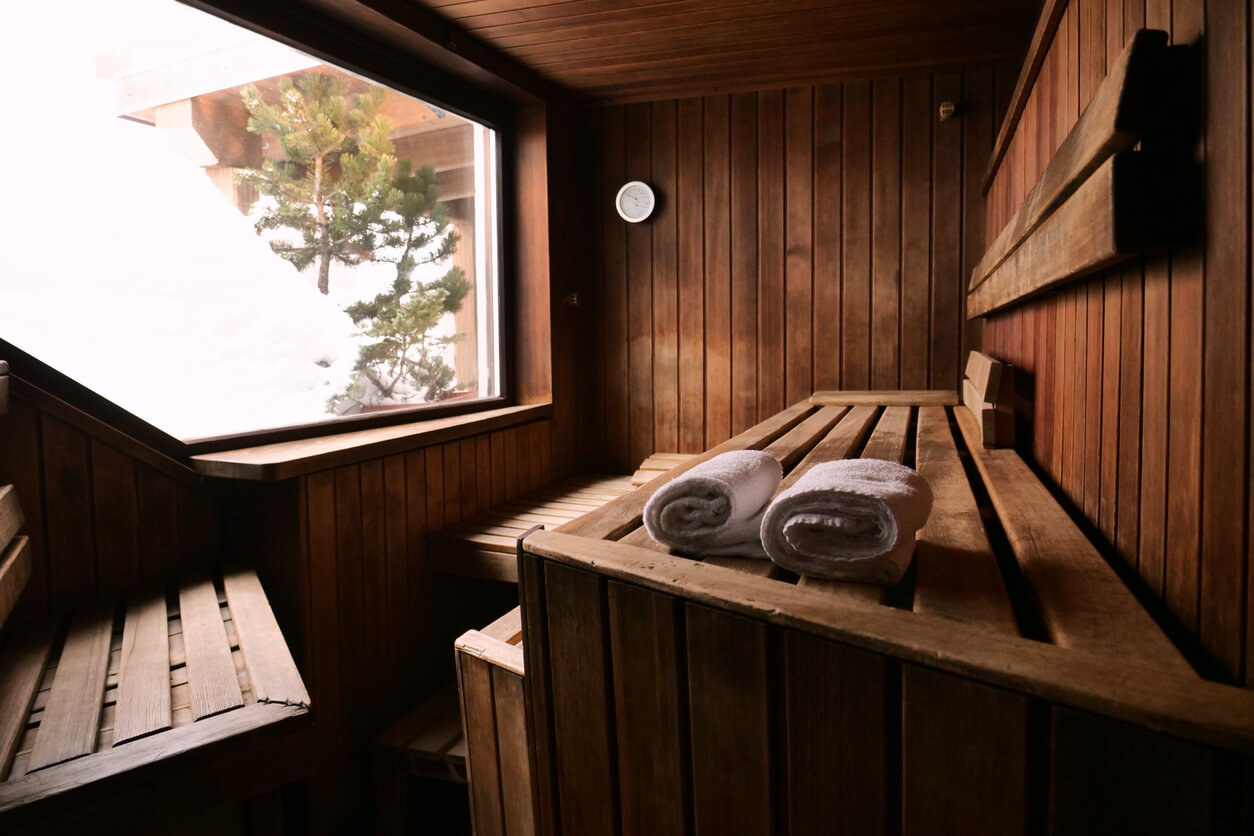
- Benches. Wooden seating for the interior secures comfort and practicality. We use the strongest 2×4 construction for bench tops and bench frames.
- Fasteners. Appropriate screws and nails tailored to your basement. Use Galvanized screws where possible.
- Vapor Barrier. Installed behind the wall panels to prevent moisture seepage. Install with the foil side facing inwards, overlapping on studs.
- Heat-Resistant Flooring. Optional, but recommended for safe flooring around heaters. A raised floor duckboard is a good option and gentler than walking on bare concrete.
Step-by-Step Installation Guide
Step 1: Prepare the Space
Begin by clearing the designated basement area and removing debris or any existing structures. Use a stud finder to locate existing wall studs, marking them for potential attachment to the sauna frame. Whether you are constructing indoor saunas or exploring other sauna types like outdoor saunas and barrel saunas, preparation is key. Cut the thermal insulation to size using an insulation knife, and lay it on the floor, walls, and ceiling.
Make sure the insulation is securely fastened, with no gaps, to minimize heat loss typical of a dry heat environment. Use a foil vapor barrier in front of the insulation. Strapping is not required, but it is a good idea when incorporating an exterior wall into your structure.
Step 2: Install the Framework
Layout the foundation framework on the basement floor, using a level to establish evenness before securing it into place. Adjust the frame height and width as per the marked dimensions, securing it using appropriate fasteners tailored to the basement floor material.
Check for stability by gently applying pressure at different points to ensure there’s no shifting or wobbling. This is a common requirement in both Finnish saunas and infrared sauna setups.
Step 3: Fit Walls and Ceilings
Begin paneling the walls using cedar panels, making sure a snug fit between the walls to promote optimal coverage. Use a brad nailer or finishing nails to secure the panels to the framework, establishing alignment using your level. Using a mallet, you can tap each board so that it is level, tapping from left to right, then right to left on the above board to avoid fanning.
Install the ceiling panels first, verifying all panels fit tightly and align perfectly. You can then proceed with the walls, starting with the back wall and ending with the door. Pay particular attention to corner joints, making sure they are tight to prevent air leaks. We recommend offsetting the V-joints in the T&G and using corner trim to cover the seams.
Step 4: Set Up Benches and Door
Position the bench frames along the interior walls at the specified locations, fastening them securely to the wall. Assemble the benches outside the sauna and then install them on the assembled bench frames. Install the sauna door in the prepared opening and use a level to establish a perfect fit to prevent drafts.
Having the proper knowledge of the type of sauna you are constructing—whether an infrared sauna, Finnish sauna, or versatile barrel sauna—will help inform door type and installation. Check all seals and handles, adjusting as necessary for a tight, secure fit.
Step 5: Install Electrical Components
A certified electrician is required to hard-wire any traditional sauna heater. Carefully follow manufacturer guidelines to mount your sauna heater, maintain a safe distance from all wet areas and comply with safety standards. When choosing your heater type, make sure the installation is proper by following the correct wiring diagrams and maintaining your clearances.
Ensure that your electrician has securely fastened all electrical components, making sure they follow local electrical code regulations for safety. There should be no visible wires, and outlets are not permitted inside the sauna. This is a practice equally relevant to indoor saunas and exterior walls of outdoor saunas.
Step 6: Final Touches and Checks
Inspect all installations, making sure that walls are secure, the door is functioning correctly, and benches are firmly in place. Install any bench skirting, fixed backrests, and corner trim at this time. Install optional floor duckboards or non-slip surfaces for added safety around heater areas. Consider placing thermometers or hygrometers inside the sauna to monitor temperature and humidity, making sure optimal dry heat conditions are consistently maintained.
Step 7: Maintenance and Safety Readiness
Conduct a test run, monitoring heat distribution and checking for any drafts or heat loss areas. Implement regular maintenance checks, such as cleaning wood surfaces and inspecting for structural wear and tear. Ensure all users understand safety and operating procedures for a secure and enjoyable sauna experience, regardless of the type.
Maintenance and Safety Tips
- Regular Cleaning and Wood Treatment. Clean the interior wood surfaces of your sauna regularly to prevent the buildup of mildew and grime. Use warm water or a gentle cleaning solution to preserve the natural beauty and integrity of the wood.
- Inspect for Cracks and Wear. Routinely check for any cracks or signs of wear on the wood panels to maintain the sauna’s structural integrity. Repair any damage immediately to prevent further deterioration.
- Annual Electrical Inspections. Have a qualified electrician inspect your electric sauna heaters and all electrical components annually. This ensures safe operation and compliance with local electrical code regulations.
- Follow Safety Guidelines. It is important that all users are aware of operating procedures to maintain a safe environment. Follow the manufacturer’s recommendations when applying water with a ladle. Respect public gyms if they request a dry-only sauna.
- Monitor Usage Time. Establish and follow safe usage times for your sauna to prevent overheating and preserve equipment longevity. Limit sessions to 15-20 minutes per session, with a cooldown break, unless advised otherwise by a healthcare professional.
- Maintain Proper Ventilation. Proper ventilation in your basement sauna prevents moisture buildup and enhances air quality. It also prolongs the lifespan of the sauna components.
- Regular Component Checks. Frequently check the functionality of doors, benches, and other structural components to make sure they remain sturdy and effective. Address any issues immediately to prevent potential safety hazards.
- Enhance Safety with Accessories. Consider adding cedar duckboards or non-slip surfaces to the sauna floor to reduce the risk of slips and falls. Use safe and approved aromatherapy oils to prevent any adverse reactions.
FAQs and Troubleshooting
What Should I Do If My Sauna Doesn’t Heat Properly?
If your sauna isn’t heating up properly, the first step is to verify that all electrical connections to the sauna heaters are secure and meet wiring standards. Any loose connections or faulty wiring can impede the sauna’s heating efficiency. Also, double-check the ventilation and insulation in your sauna space to guarantee there are no issues that could prevent the sauna from reaching the desired temperatures.
How Do I Maintain My Sauna’s Woodwork?
To maintain the woodwork in your sauna, regularly clean the surfaces using a damp cloth and mild soap to remove any dirt or buildup. Avoid excessive moisture, especially in dry saunas, to prevent wood warping or mildew. Treat the wood with a recommended sealant or oil specifically designed for sauna use to preserve its longevity and appearance, making sure it can withstand high temperatures and humidity.
What Are Common Signs of Wear and Tear in a Sauna?
Common signs of wear and tear in a sauna include visible cracks or splits in the wood panels, discoloration from excessive moisture or heat, and loose bench fittings. You might also notice a decrease in heating efficiency or uneven heat distribution if the electrical components or insulation are compromised. Regular maintenance and prompt attention to these issues can help prevent more severe damage and maintain your sauna’s functionality.
How Can I Improve Energy Efficiency in My Basement Sauna?
To boost energy efficiency in your basement sauna, make sure all insulation is intact, particularly around the sauna walls, ceiling, and floor, to reduce heat loss. Ensure your sauna heater is not undersized, and consider using a timer to limit operation time and conserve electricity. Additionally, maintaining a good seal around the sauna door helps retain heat longer, reducing the need for continuous heating. It is normal for indoor saunas to have a small air gap under the door
What Should I Do If There’s an Odor Coming From My Sauna?
If you notice an unusual odor coming from your sauna, it could be due to mold or mildew, especially if moisture has seeped into the wood. Ventilate the sauna after each use and clean all surfaces regularly to prevent moisture buildup. If the odor persists, inspect for any water damage or leaks, repair them immediately, and treat affected areas with anti-microbial products safe for sauna wood.
Looking for Quality Home Sauna Materials for Your Next Project? Get It at Home Saunas!
Building a sauna in your basement shouldn’t be complex or hard. With the right tools, materials, and information, it becomes an achievable and fulfilling project. Transforming an ordinary space into a personal relaxation haven is within your reach, and the process can be both straightforward and rewarding.
Let Home Saunas guide you on this exciting DIY journey with our expertly designed home sauna kits. These kits are crafted to simplify the process, providing everything you need along with detailed instructions to establish your success. Our team is dedicated to providing support and guidance, making sure you have a smooth construction experience and achieve the sauna of your dreams.
Start your new project with confidence. Reach out to us for a consultation today, and take the first step towards enjoying a luxurious and rejuvenating retreat in your very own home!