x

For any questions, customizations or quotes, please call us at 1.800.519.5753 or e-mail: info@homesaunakits.com

Visit us in store at 271 Shoemaker St, Unit #2, Kitchener, ON, N2E 3B3. Showroom hours are 9am to 4pm.

Online ordering temporarily disabled - Please call us at 1.800.519.5753 or e-mail: info@homesaunakits.com

Pinterest

Top 5 Ways to Enjoy Your DIY Home Sauna Kit After the Building is Done

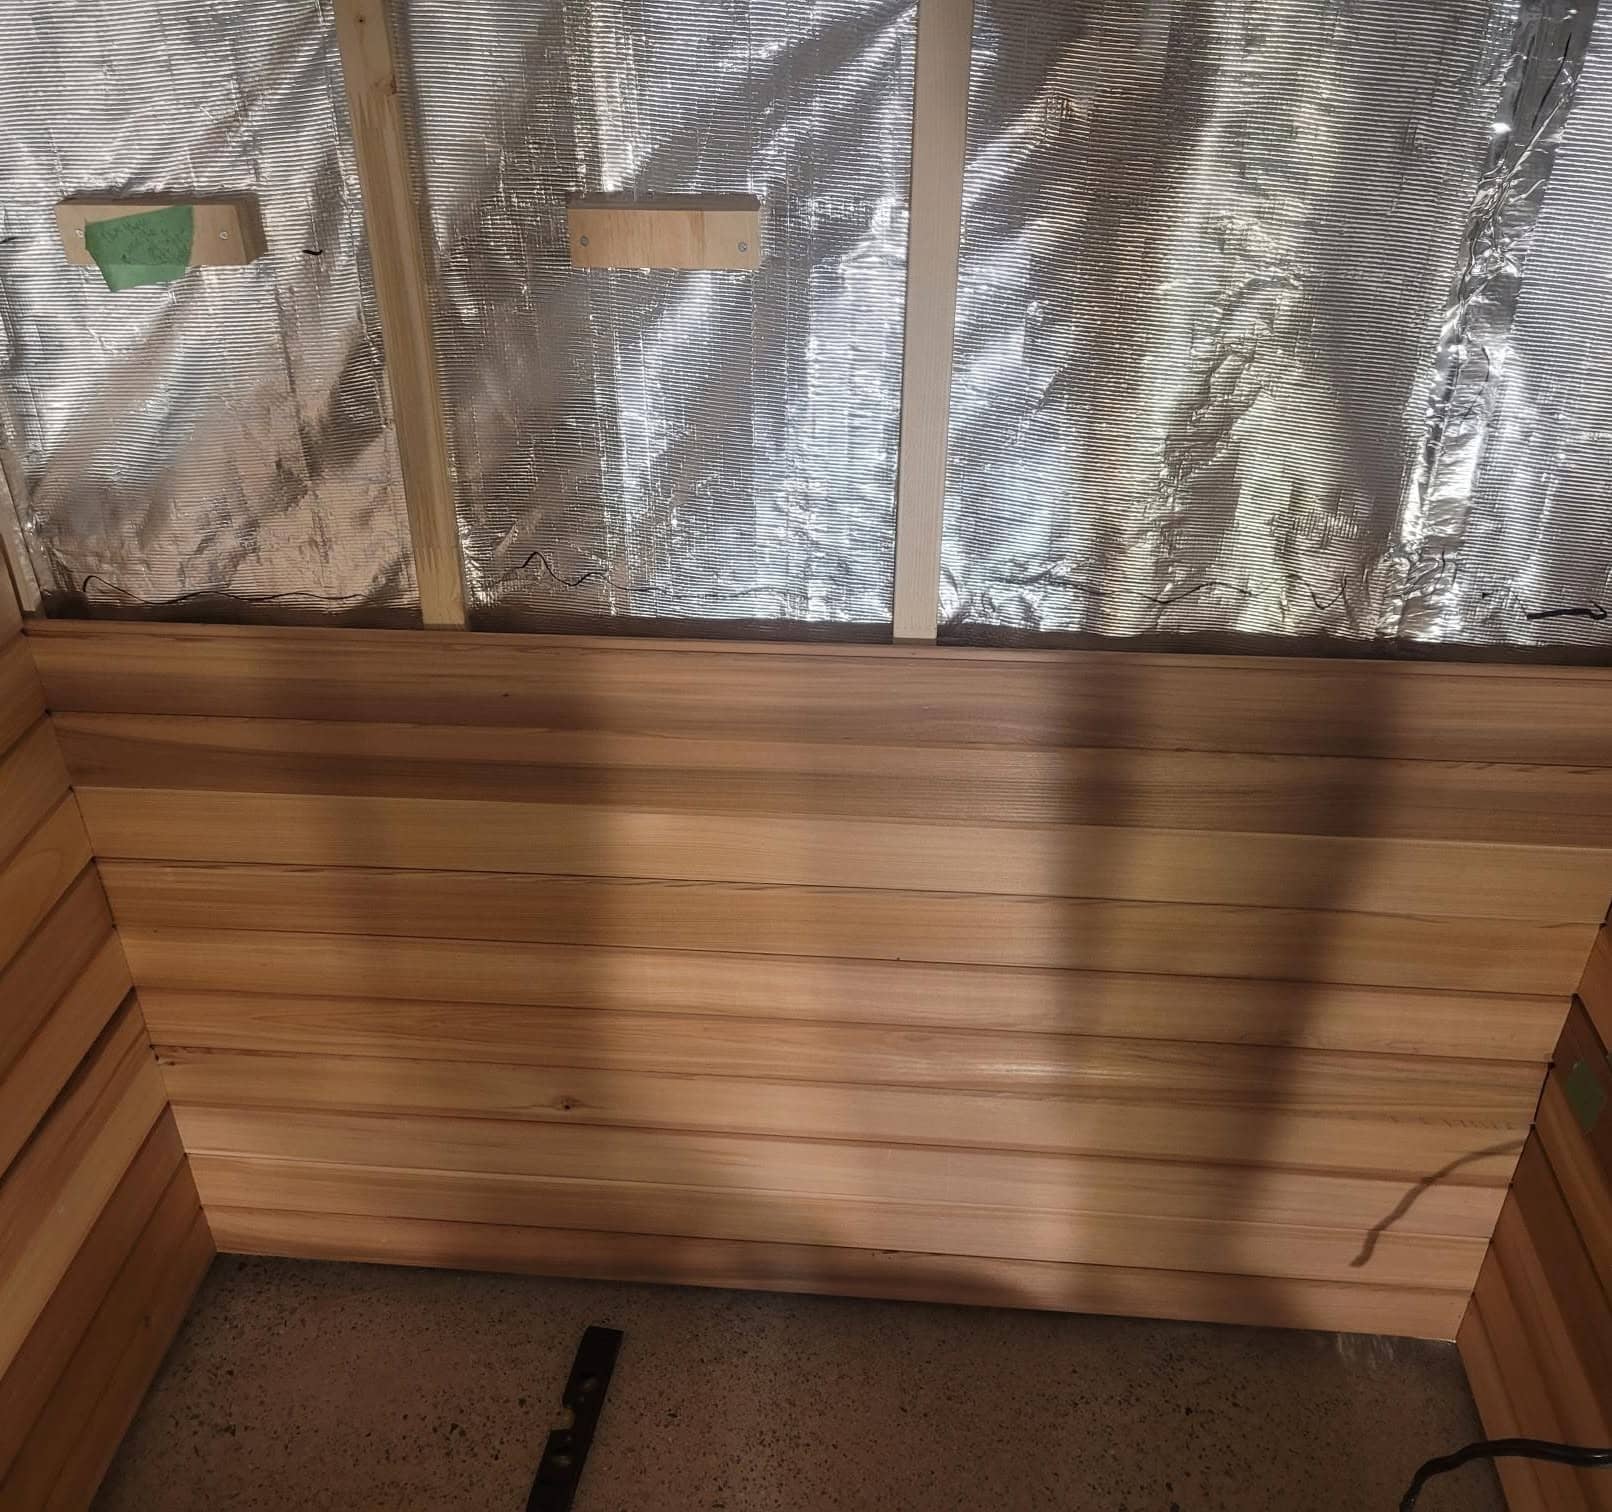
You built the sauna, now the question is what you do with it.

A finished home sauna can change the way you recover after workouts, wind down at night, host friends, warm up in colder months, or carve out quiet time in a busy house. The room is ready; the value comes from finding the uses that actually fit your life.

That might be a short post-workout session, a slow evening cool-down, a quiet stretch in the heat, or a relaxed weekend sauna with family. This guide covers five ways to enjoy your DIY home sauna kit after the hard grind of building is done.

Way #1: Use It For Recovery After Workouts Or Long Days

Your sauna can become a reliable recovery space after exercise, physical work, or a demanding day. The heat helps you slow down, loosen up, and give your body a clear transition from effort to rest.

After a workout, keep the routine simple:

  • Rehydrate before you get in
  • Let your heart rate come down
  • Start with a shorter session
  • Cool down with fresh air or a shower
  • Drink more water afterward
  • Rest for a few minutes before returning to your day

A sauna can also help after long days that are not workout-related. Time in the heat can ease the feeling of stiffness from sitting, standing, driving, or working outside.

Think of recovery as consistency, not intensity. You do not need to turn every session into a test. The benefit comes from using the sauna in a steady, comfortable way that helps you feel ready for the next day.

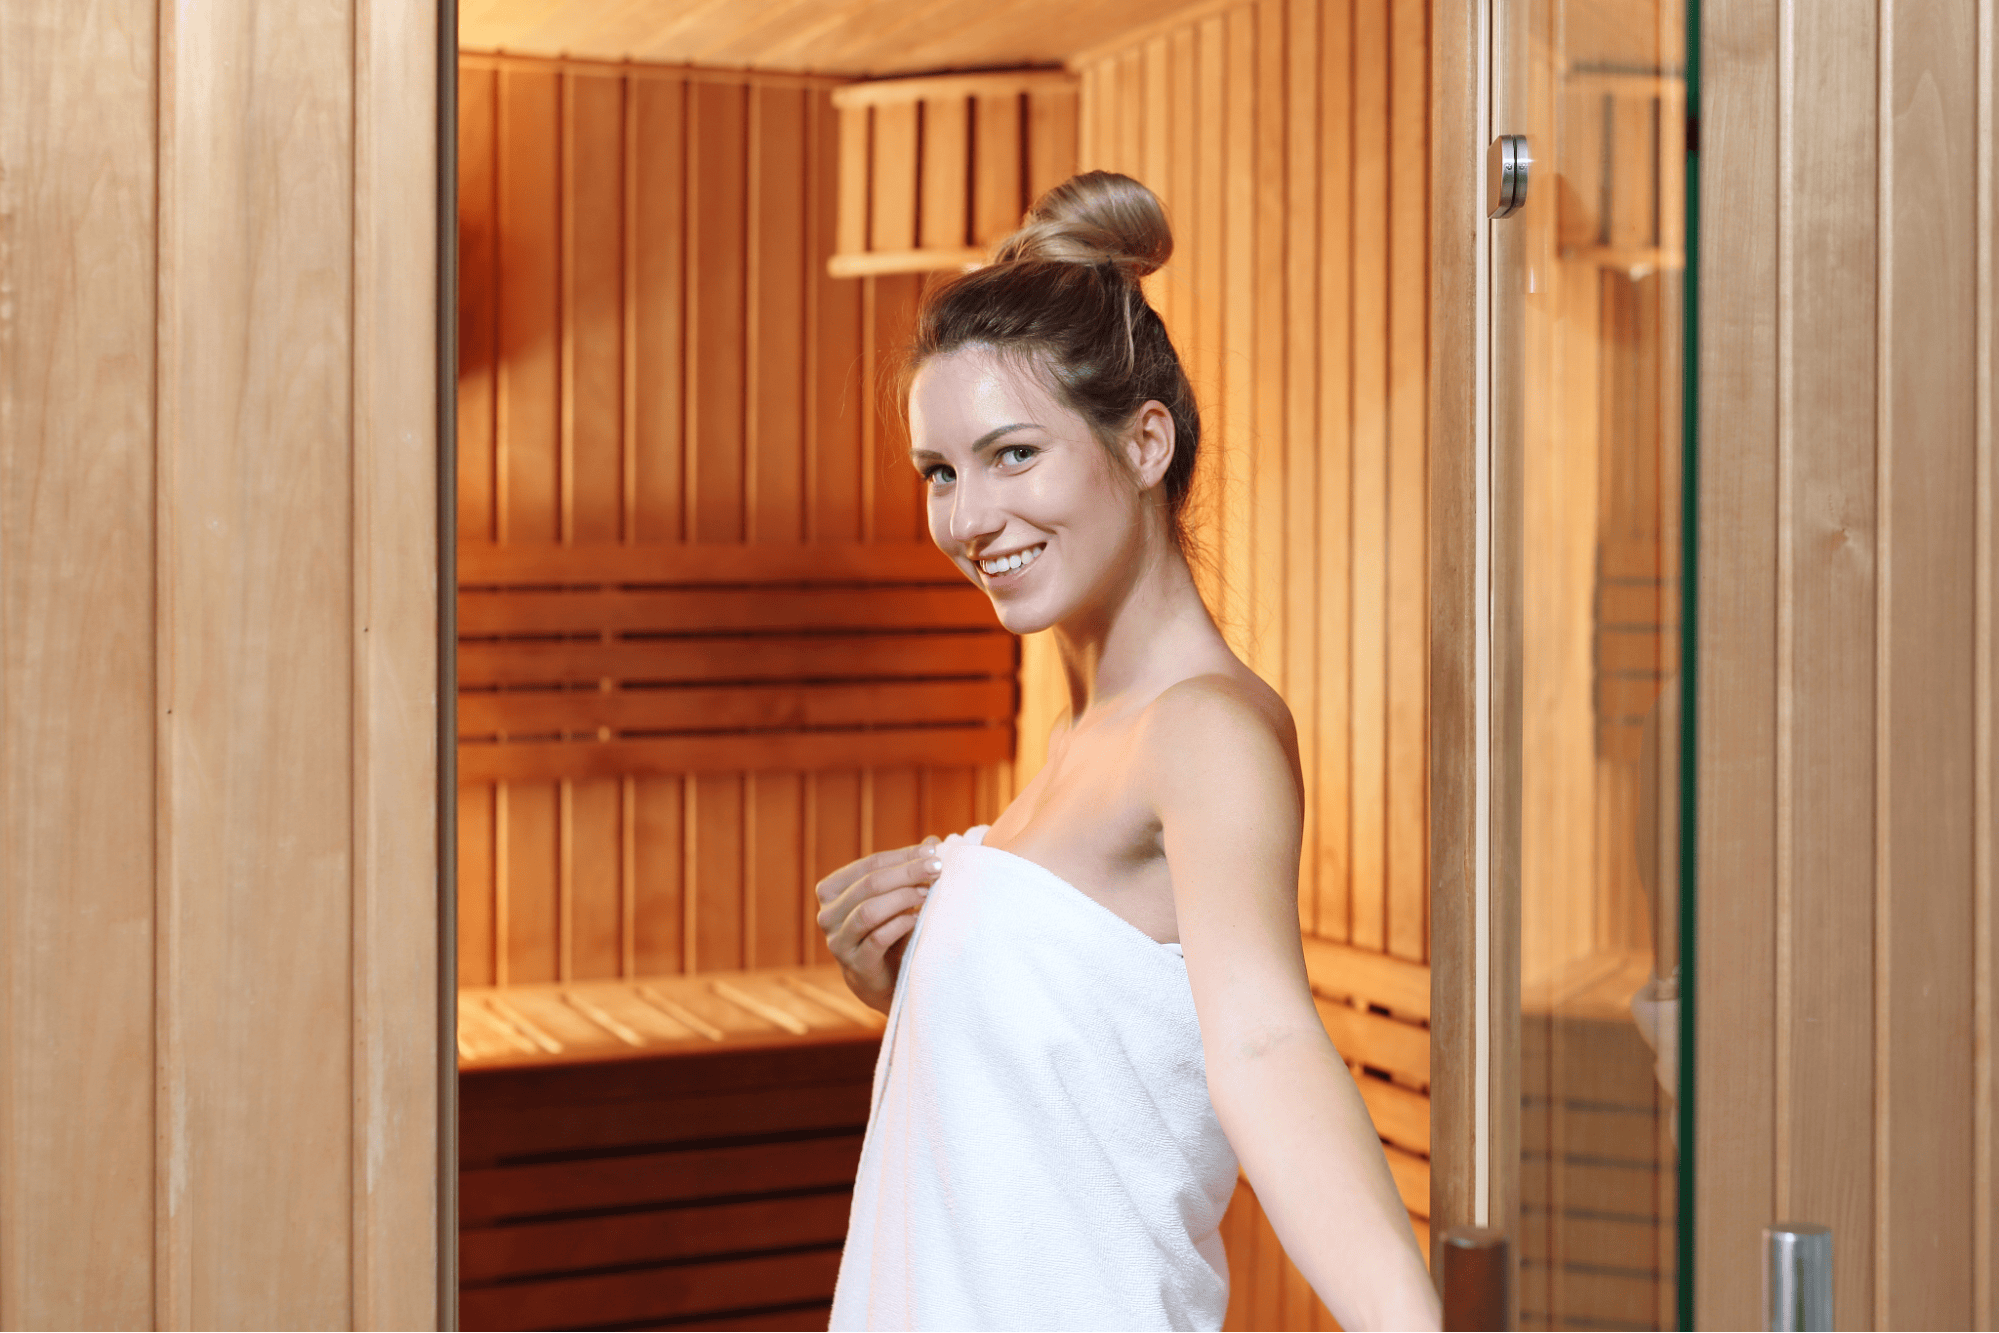
Way #2: Make It A Social Space

A home sauna can be a natural place to slow down with other people. Unlike a living room or kitchen, the sauna removes most distractions. There is no television, no meal to prepare, and no need to fill every pause. The heat creates a quieter kind of conversation.

Use it with a partner, family member, or close friends after dinner, on a weekend, or after time outside. Keep the session comfortable for everyone, especially if someone is new to sauna bathing. Shorter rounds, cool-down breaks, and water nearby make the experience easier to enjoy.

The best social sauna sessions are relaxed, not crowded. Give people enough bench space, keep towels available, and let the group move in and out as needed. A home sauna should feel welcoming, not like a challenge.

Over time, the sauna can become a shared ritual: a place to catch up, unwind, and spend time together without the usual noise of the house.

DIY home sauna kit

Way #3: Turn It Into A Quiet Relaxation Routine

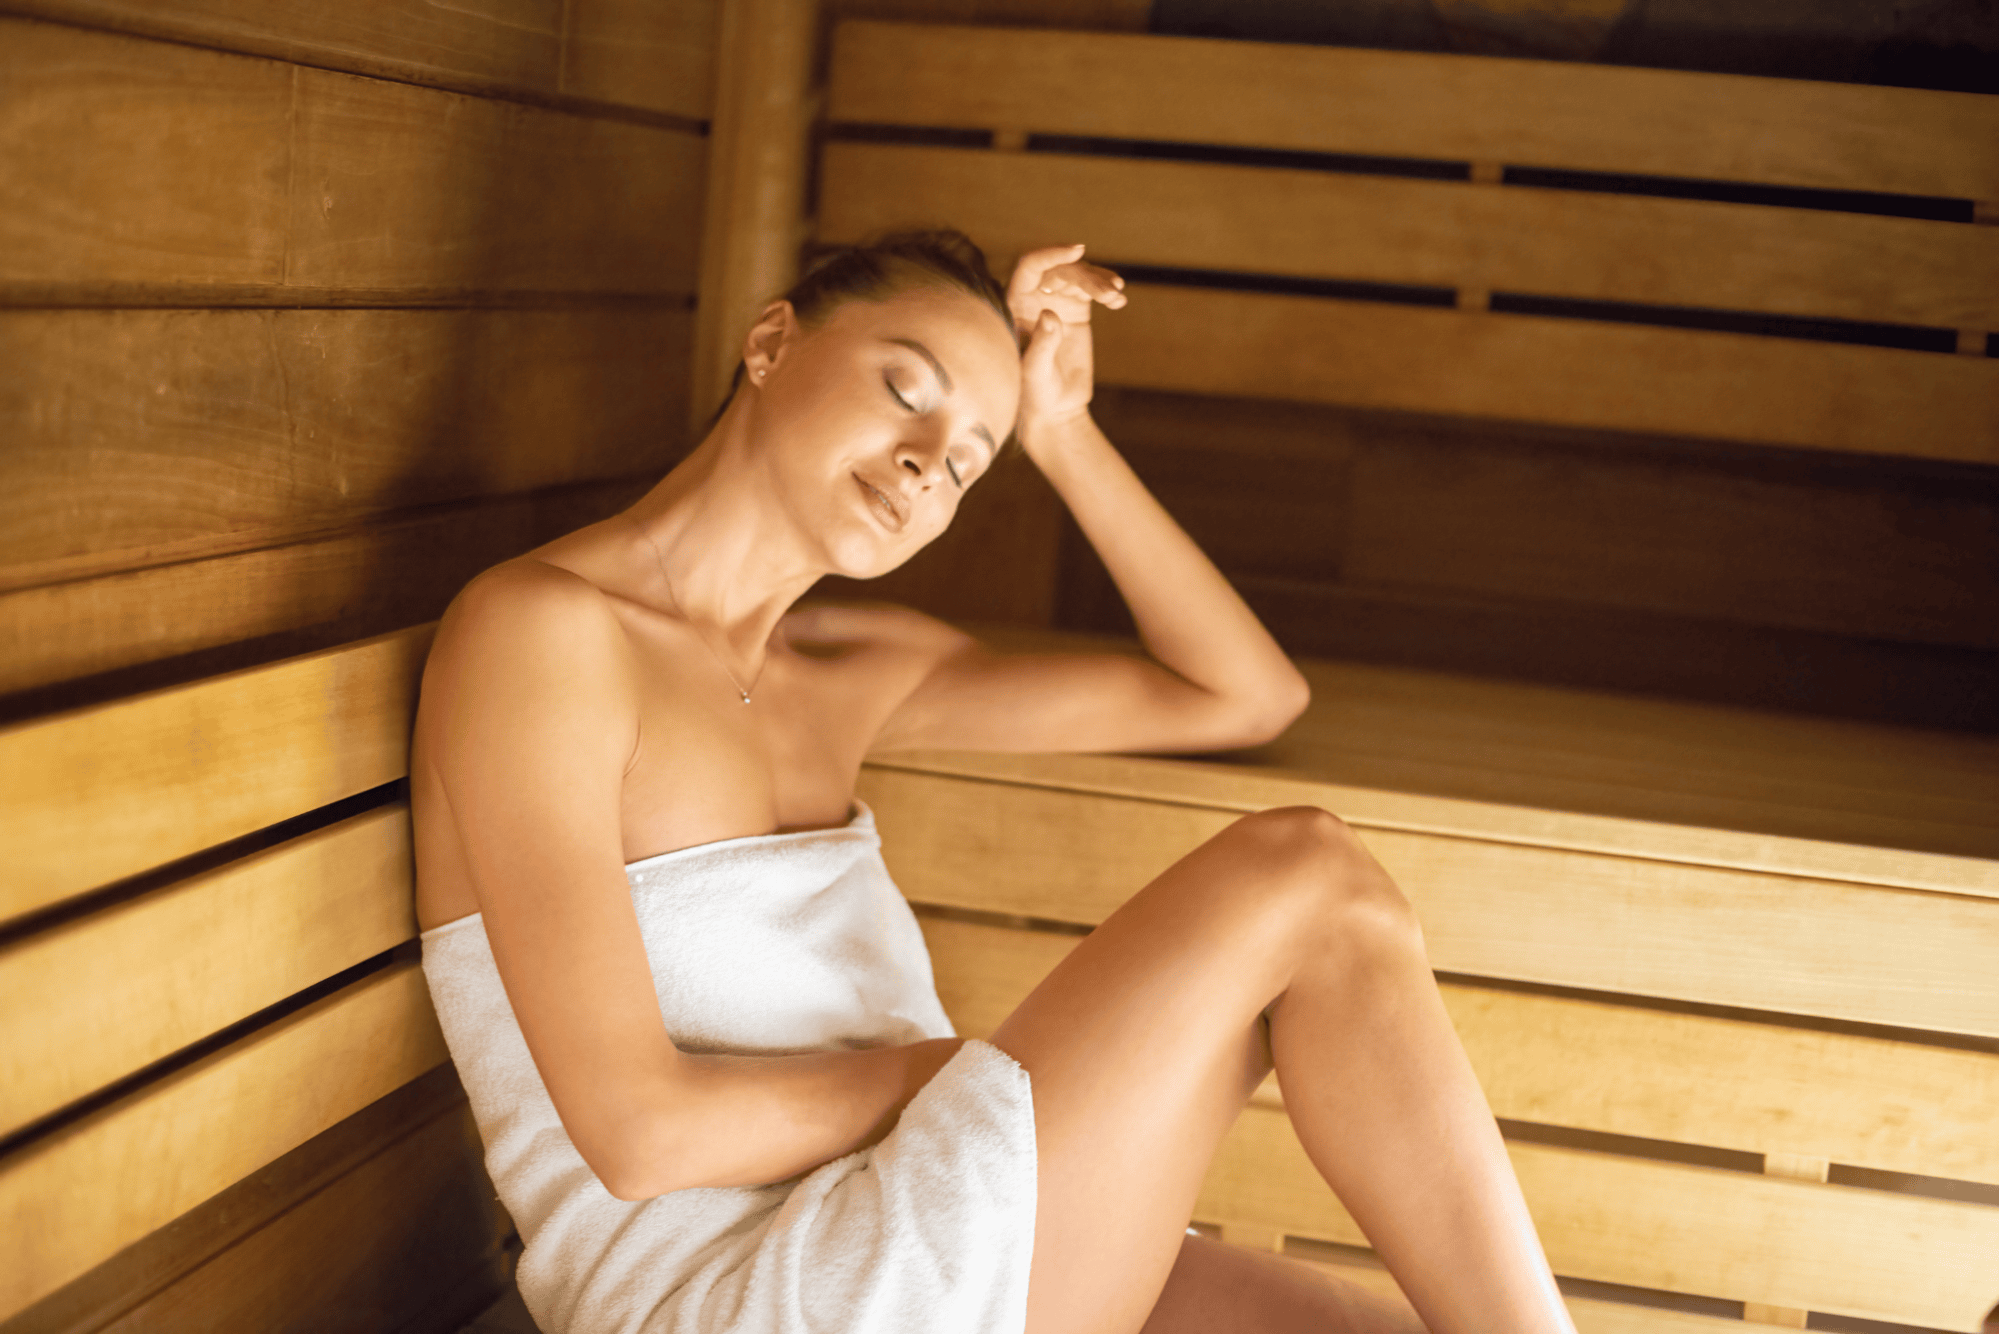
Your sauna can become one of the few places in the house where nothing needs to happen. No screen, no multitasking, no background noise. Just heat, stillness, and a clear pause in the day.

Use it as an evening wind-down, a weekend reset, or a quiet break after work. Keep the routine simple: preheat the sauna, bring water, sit comfortably, breathe slowly, and let the heat do its work. If your mind is busy, do not force it to relax. Give it a few minutes. The steady warmth usually helps the pace of the day drop on its own.

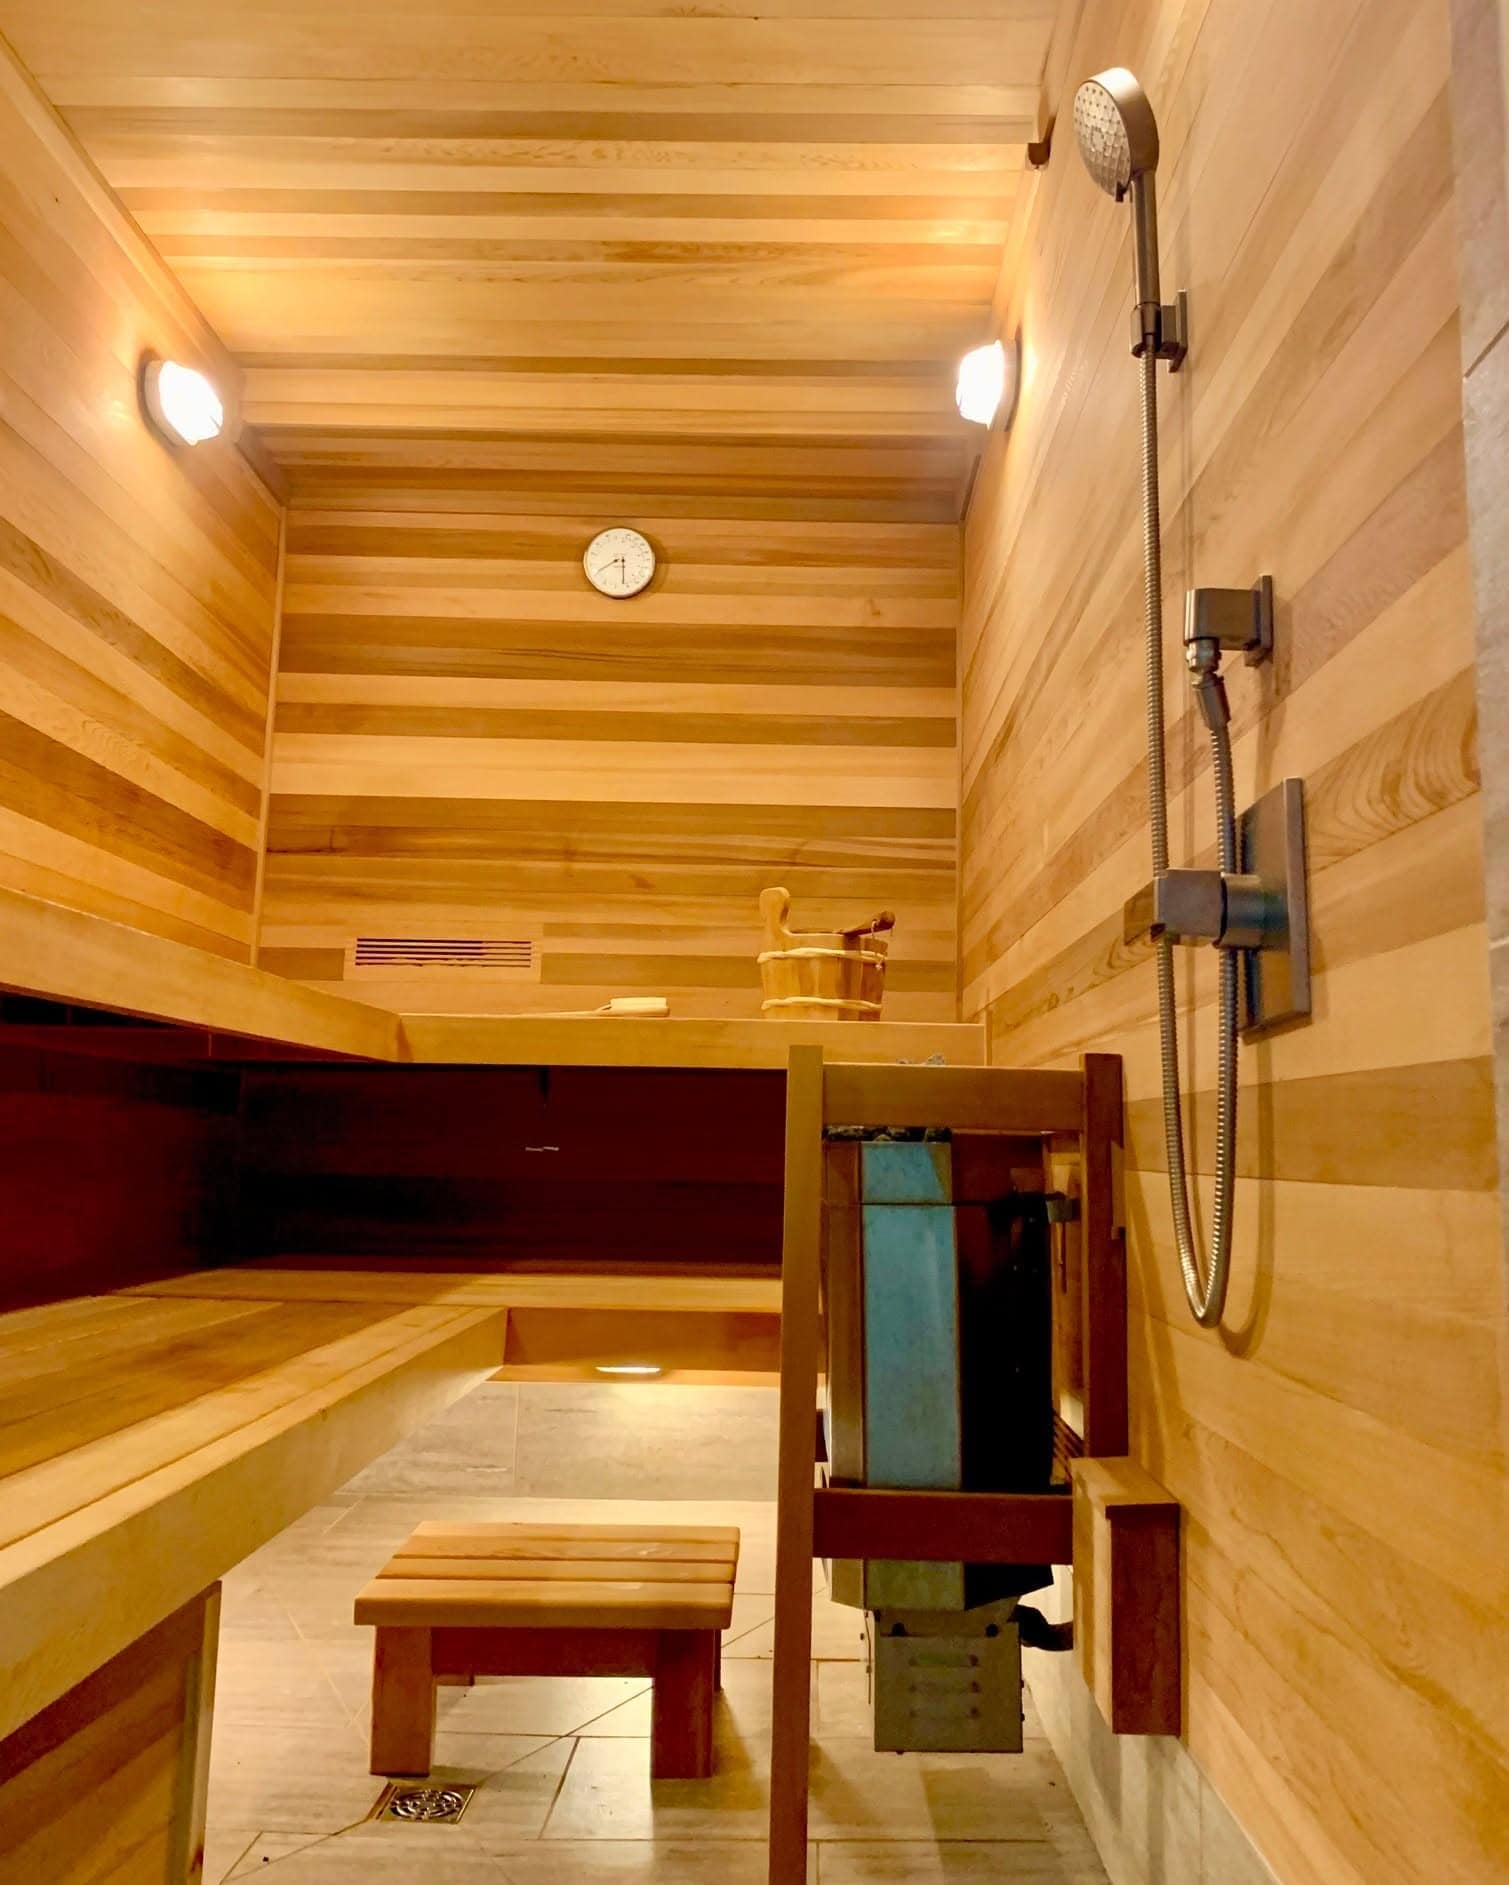
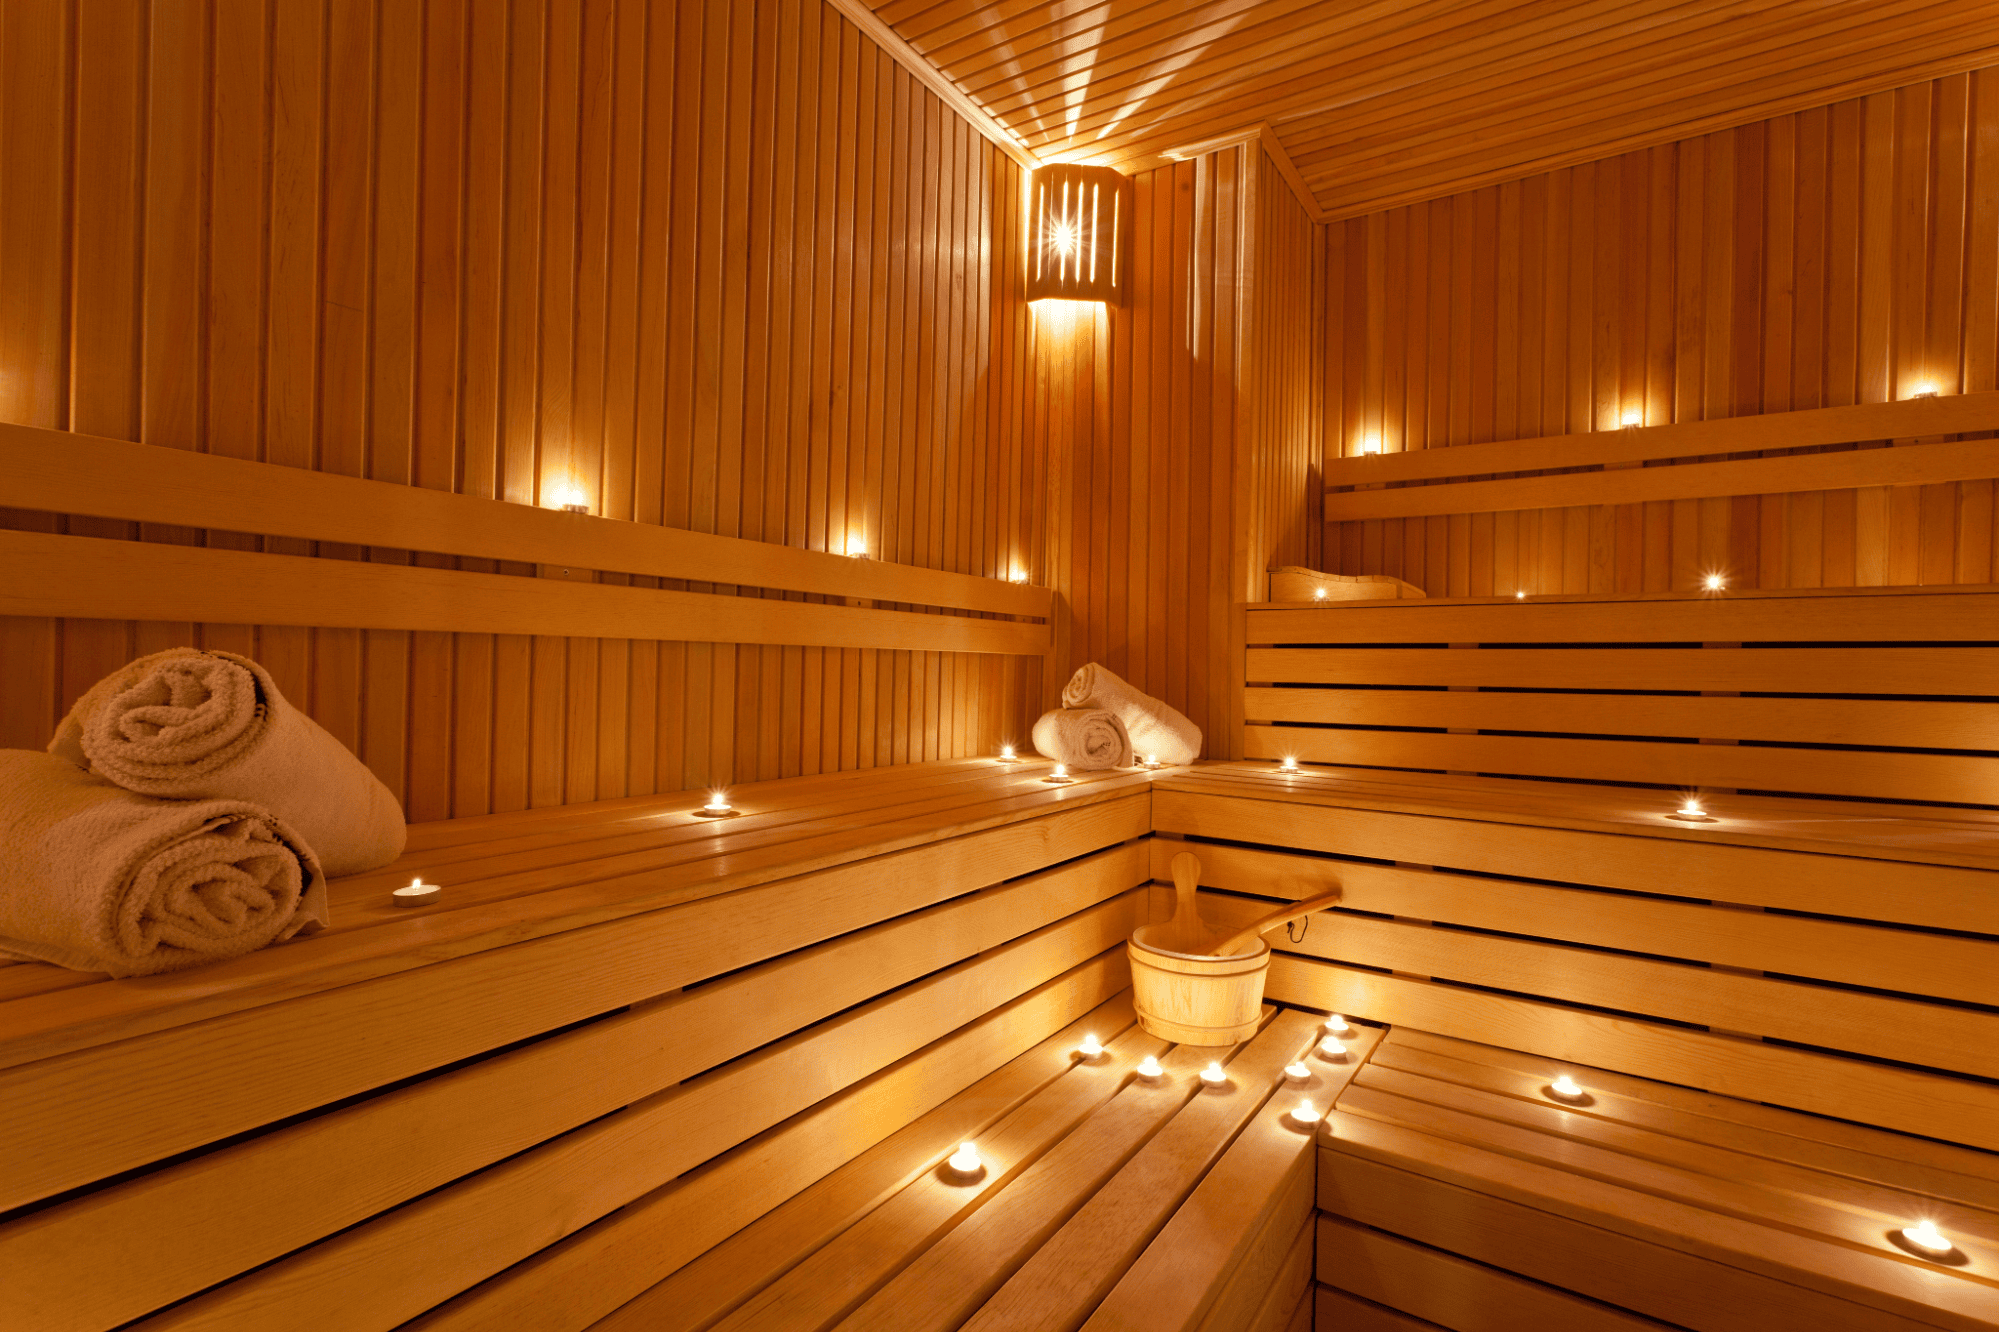
Lighting and atmosphere matter here. A softer light, clean towels, a comfortable backrest, and a quiet cool-down space can make the sauna feel less like another room in the house and more like a personal retreat.

The goal is not to stay in as long as possible. The goal is to step out feeling calmer than when you went in.

Way #4: Explore Heat, Steam, And Aroma

Once you are comfortable with basic sauna sessions, start paying attention to how small changes affect the room. A dry sauna feels different from a sauna with a little water on the stones. A short session feels different from two rounds with a cool-down between them. Part of the enjoyment is learning how you like the heat.

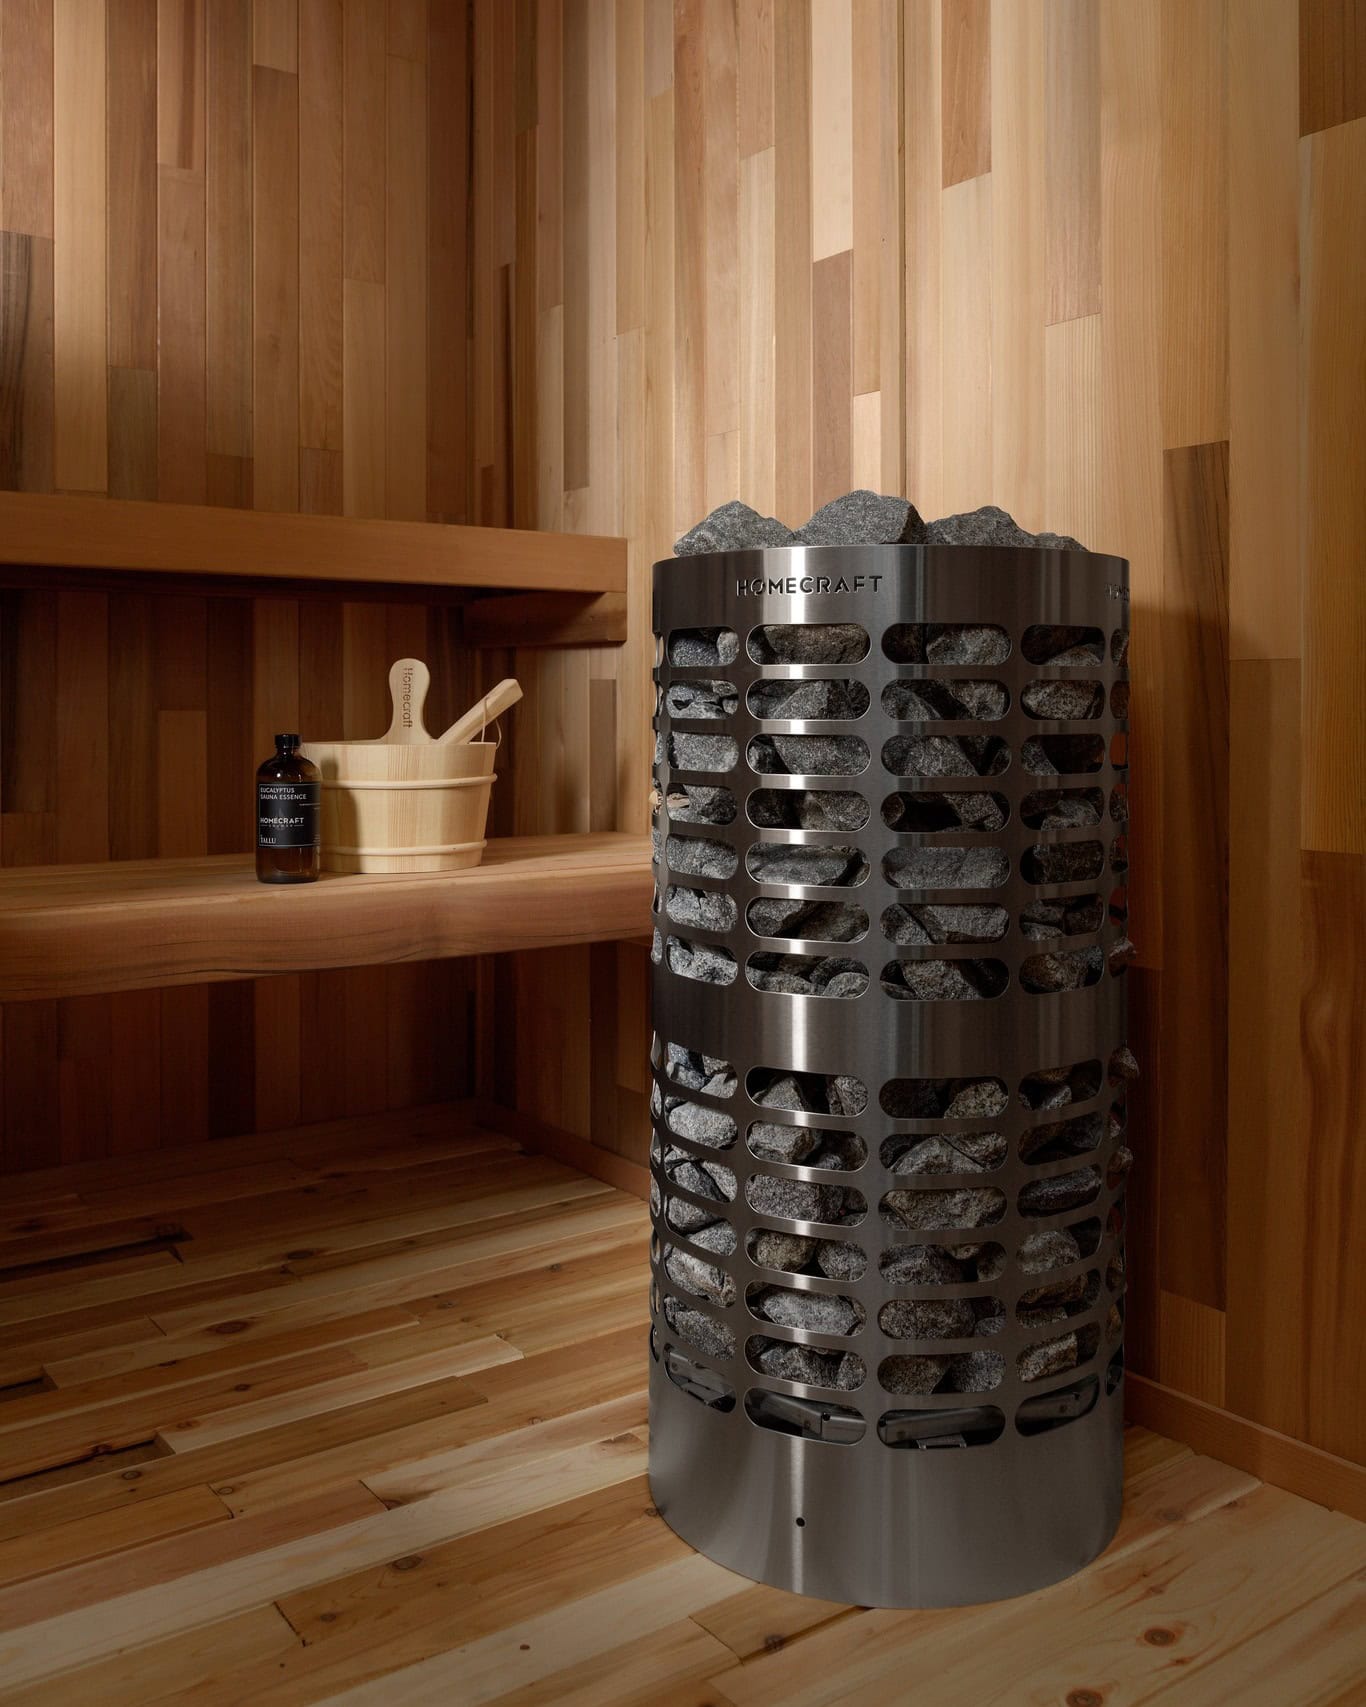
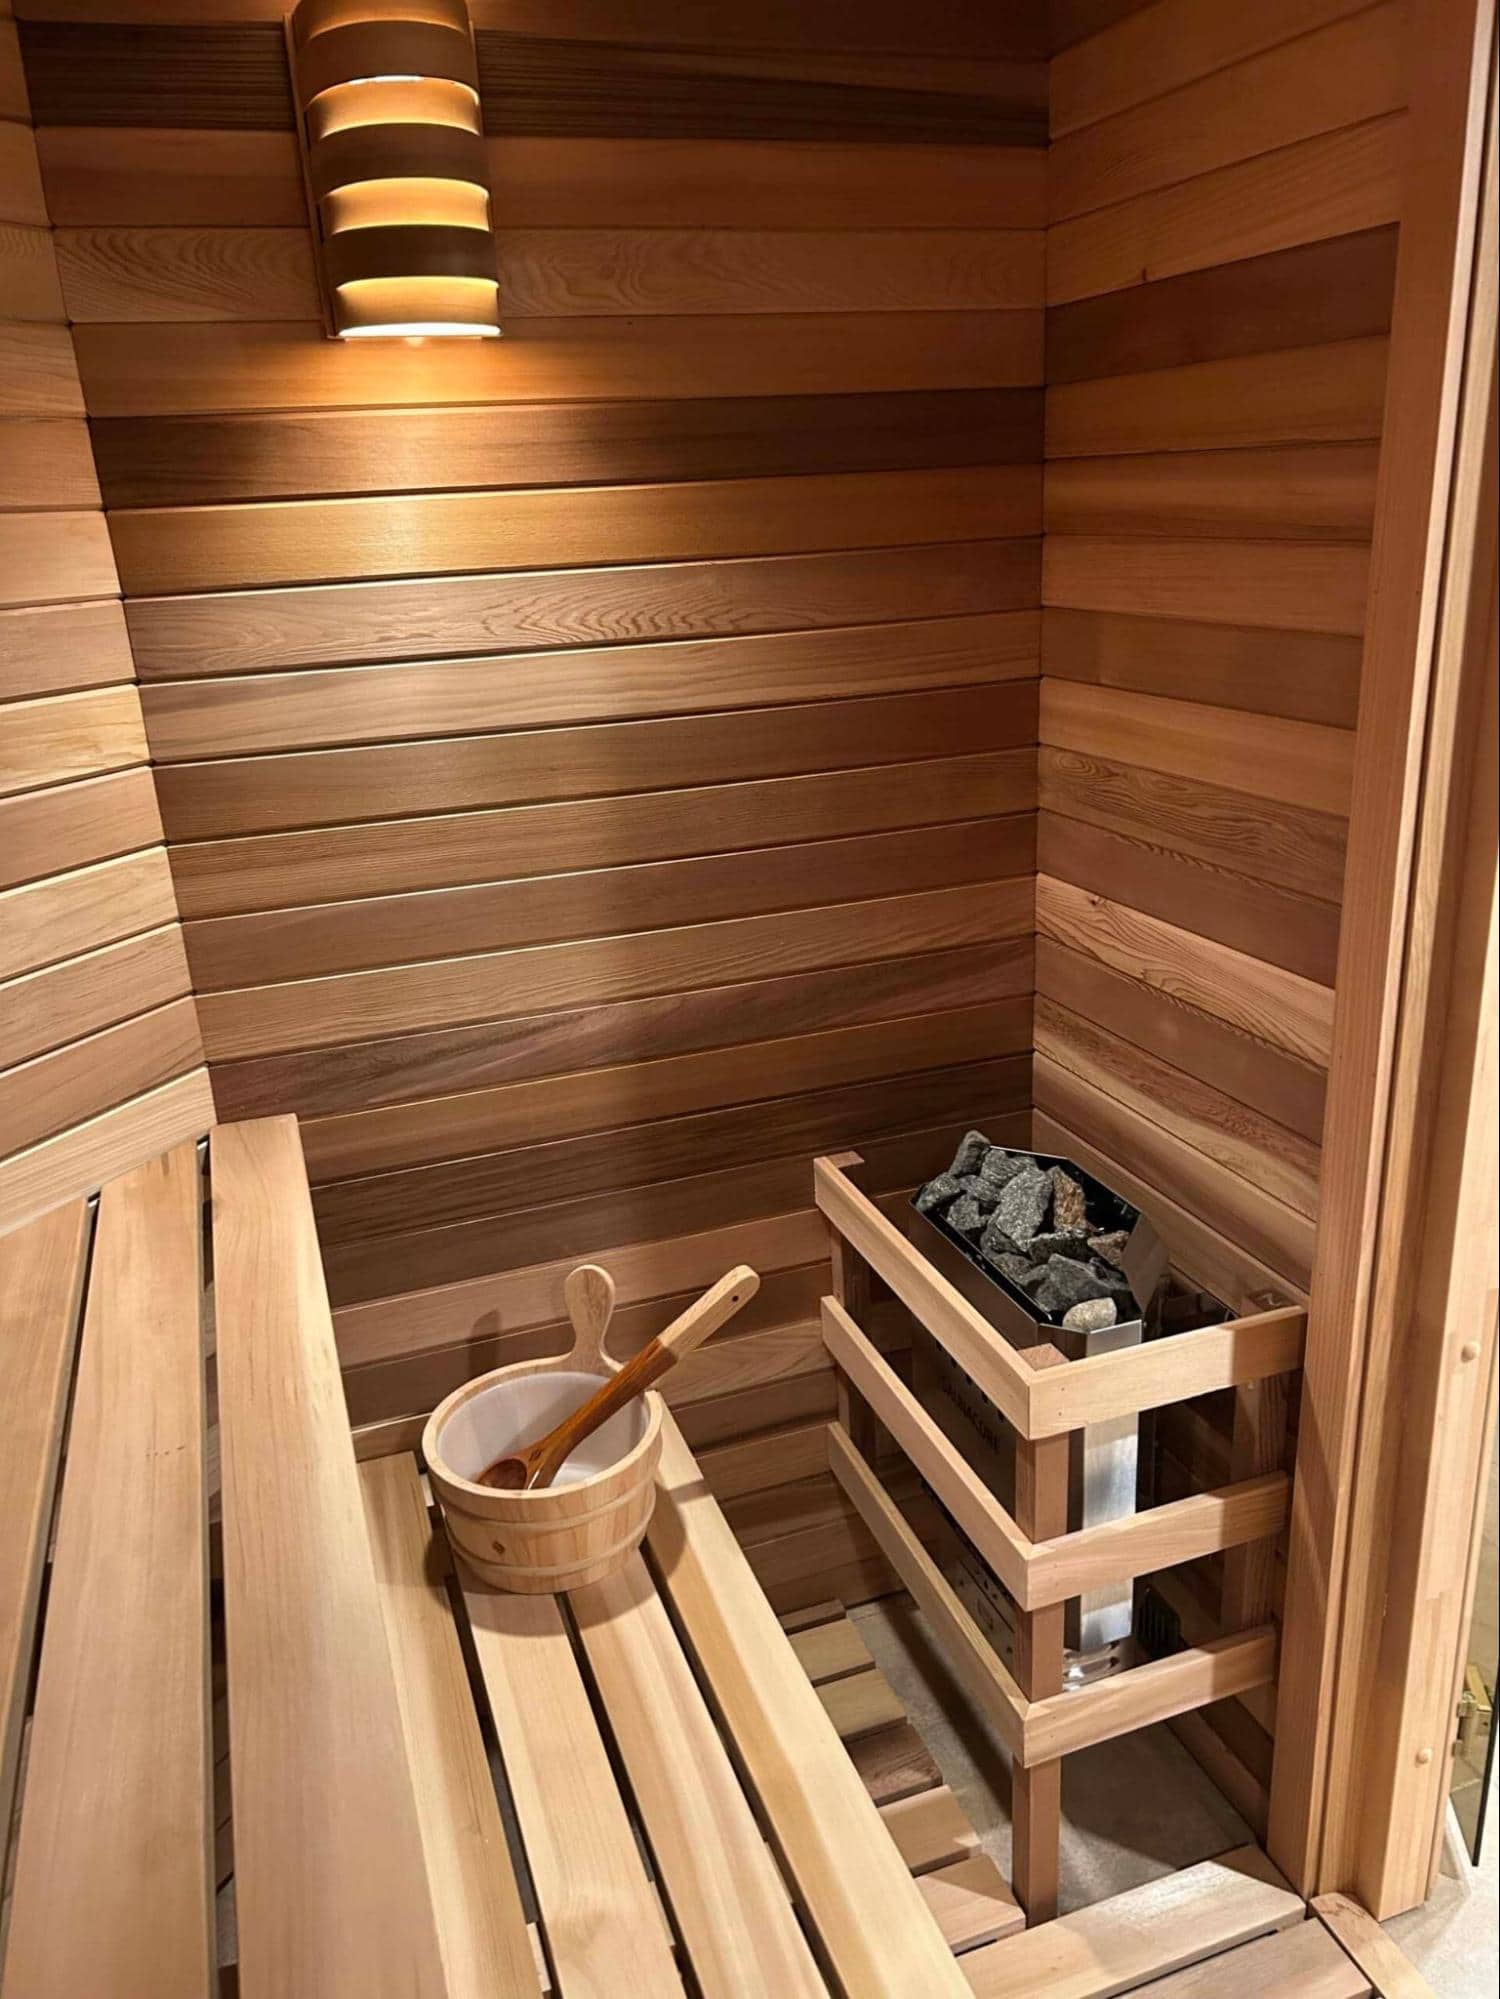
Use a bucket and ladle to add water gradually. A small amount creates a quick wave of steam and heat, while too much can make the room feel heavy. Let the stones recover between pours and adjust slowly instead of flooding the heater.

You can also experiment with atmosphere:

  • Try shorter dry-heat sessions
  • Add small amounts of water to the stones
  • Use sauna-safe aromatics when appropriate
  • Adjust lighting for a calmer setting
  • Cool down between rounds
  • Notice what temperature and humidity feel best to you

This turns the sauna from a finished room into a personal experience. Over time, you learn the rhythm, heat level, and atmosphere that make the space feel like yours.

DIY home sauna kit

Way #5: Add Gentle Stretching Or Sauna Yoga

Your home sauna can be a good place for gentle stretching, breathwork, and slow mobility work. The heat creates a calm setting, but it also means you should keep your movements simple and controlled.

Think of this as sauna yoga, not a full hot-yoga class. Hot yoga studios are heated, but a traditional sauna is usually much hotter. Save intense flows, standing balance poses, and long sequences for a safer space outside the sauna. Inside the sauna, focus on seated stretches, slow breathing, shoulder rolls, neck mobility, and light movements that do not require much space.

Keep your session short. Sit on a towel, move slowly, and step out if you feel dizzy, lightheaded, or uncomfortable. Drink water before and after, and give yourself time to cool down.

Used this way, your sauna becomes more than a place to sit in heat. It becomes a quiet space to loosen up, breathe, and reconnect with your body without turning the session into a workout.

Make The Sauna Part Of Your Home

The best part of a DIY sauna comes after the build is finished. Once the cedar is installed, the heater is working, and the room is ready to use, your sauna becomes part of daily life: a place for recovery, quiet time, conversation, warmth, and simple routines you can return to again and again.

At Home Sauna Kits, we build our DIY sauna kits to help homeowners create that kind of lasting space. The right materials, heater options, benches, vents, and accessories all work together to make the sauna feel comfortable, practical, and easy to enjoy after installation.

Whether you use your sauna after workouts, with friends and family, for relaxation, or for gentle stretching, the goal is the same: build a room that keeps giving value long after the project is complete.

Top Tips For Installing A DIY Home Sauna Kit As A Beginner Builder

Before you install a DIY sauna kit, the room has to be ready for heat, moisture, wiring, ventilation, and daily use. A missed measurement, unclear heater location, forgotten vent, or rushed electrical plan can create problems long before the cedar is installed.

A DIY sauna kit gives you a clearer path through the project, but it does not remove the need for proper preparation. The room still needs to be framed, insulated, wired, and planned in the right order. Once those pieces are in place, the kit materials can do what they are meant to do: turn a prepared space into a finished sauna.

These tips will show you where to slow down, what to check first, and how to avoid the mistakes that are hardest to fix later.

Tip #1: Measure Twice Before Ordering

Your sauna kit should match the room you are actually building. Before ordering, confirm the finished width, depth, and ceiling height.

Measure after framing if possible. Small changes in wall thickness, door placement, or ceiling height can affect cedar quantities, bench layout, heater sizing, and trim.

Check the details that are easy to miss:

  • Door location and swing
  • Heater wall
  • Bench wall
  • Windows or glass
  • Bulkheads, slopes, or uneven corners
  • Areas that need blocking or clearance

A simple sketch and a few photos can help. The more accurate your measurements are, the smoother the installation will be.

Tip #2: Know What Your Sauna Kit Includes

Review your quote and packing list before the build begins. You should know which materials are included, which items are optional, and which parts of the room are still your responsibility.

Most sauna kits focus on the interior sauna materials, such as cedar boards, bench material, trim, vents, vapor barrier, lighting, and accessories. Heaters, controls, doors, framing, insulation, wiring, and labour may be separate depending on the kit.

Compare the kit contents with your room plan before you start. It is easier to catch a missing or misunderstood item before installation than halfway through the project.

Tip #3: Prepare The Room Before The Cedar Arrives

Before your cedar arrives, the room should be framed, clean, dry, and ready for installation. You do not want to unpack finish materials into a space that still needs major decisions.

Confirm the basics first:

  • Square walls
  • Final ceiling height
  • Door rough opening
  • Bench blocking
  • Vent locations
  • Electrical planning
  • Heater placement
  • Lighting location

If benches, backrests, heater guards, or accessories need extra support, add blocking before the walls are closed. Once the cedar is on site, you want to be installing, not fixing framing or rethinking the layout.

DIY home sauna kit

Tip #4: Plan The Heater And Electrical Work Early

Your heater affects the entire sauna layout. Before the cedar goes up, confirm the heater size, heater location, control placement, wiring path, and required clearances.

Start with the room volume, then account for glass, ceiling height, insulation, and colder surrounding areas. The wrong heater size can lead to slow heat-up times, uneven heat, or poor performance.

Electrical work should be planned before the walls are closed. If you are using an electric heater, involve a licensed electrician where required so the sauna is safe, compliant, and ready for installation.

Tip #5: Install The Vapor Barrier With Care

The vapor barrier is hidden once the cedar goes up, but it plays an important role in the build. It helps manage heat and moisture behind the finished sauna interior.

Install it over the insulated wall and ceiling assembly before the cedar boards go on. Pay close attention to seams, corners, and any openings for vents, lights, controls, or wiring.

Do this step slowly. A clean vapor barrier installation helps the sauna hold heat properly and protects the structure behind the walls.

Tip #6: Think Through Vent Placement Before Closing The Walls

Vent placement is easier to plan before the cedar is installed. Once the walls are closed, moving an intake or exhaust vent becomes much more difficult.

Your vents help bring in fresh air, move heat through the room, and dry the sauna after use. Their location should work with the heater, benches, and overall room layout.

Do not treat ventilation as an afterthought. A sauna can be hot and still feel stale if the air does not move properly.

DIY home sauna kit

Tip #7: Take Your Time With The Tongue-And-Groove Boards

The tongue-and-groove boards are the finished surface you will see every time you use the sauna. Install them slowly, keep each course straight, and check alignment as you go.

Work carefully around corners, vents, lights, and the door opening. Dry-fit difficult cuts before fastening, and avoid forcing boards together if something feels off.

This is where patience shows. Clean board lines, tight joints, and careful cuts will make the finished sauna feel much more polished.

Tip #8: Finish Benches, Door, Trim, And Lighting With Care

The benches, door, trim, and lighting decide how the sauna feels once the main cedar work is done. These details should not be rushed, because they affect comfort, safety, and the final look of the room.

Start with the benches. They should feel solid, smooth, and comfortable, with enough depth to sit properly and enough clearance around the heater. If your layout includes upper and lower benches, make sure the lower level gives you safe access and the upper level places you comfortably in the heat.

The door should fit cleanly and open outward. Its placement should not interfere with benches, heater clearance, or the natural path into the sauna. Trim should cover transitions neatly without looking forced, especially around corners, vents, lights, and the door frame.

Lighting should be simple, sauna-suitable, and placed where it adds comfort without glare. When these finishing details are handled carefully, the sauna feels intentional instead of improvised.

DIY home sauna kit

Bonus Tip: Test The Sauna Before Your First Full Session

Before your first full session, run the sauna long enough to confirm that everything works as expected. This is your chance to catch small issues before regular use.

Let the heater come up to temperature, check that the controls respond properly, and watch how the room feels as it warms. The door should open and close cleanly, the benches should feel solid, and the vents should be clear. Pay attention to anything loose, uneven, unusually noisy, or out of place.

Use this final testing checklist:

  • Heater turns on and operates correctly
  • Controls respond as expected
  • Lights work properly
  • Door opens outward and closes cleanly
  • Benches feel stable
  • Vents are open and unobstructed
  • Trim, guards, and accessories are secure
  • No loose fasteners or sharp edges are exposed
  • Room heats evenly
  • Sauna dries properly after use

A short test run gives you time to make small adjustments before the sauna becomes part of your regular routine.

Start Your First Sauna Build With The Right Kit

A beginner sauna build is much easier when the materials match the room from the start. Accurate measurements, a prepared space, early heater planning, careful vapor barrier work, proper ventilation, and patient cedar installation all help the project come together cleanly.

At Home Sauna Kits, we build custom DIY sauna kits around the details of your project. Your room dimensions, ceiling height, layout, and heater needs help us match the right sauna-specific materials to your space, including Western Red Cedar interior boards, bench components, trim, vents, vapor barrier, and sauna-rated lighting.

You still need to prepare the room properly, but you do not need to source every sauna component on your own. With the right kit and a clear plan, your first sauna build can feel organized, manageable, and built for years of use.

The True Cost of Quality: Why Precision-Cut Kits Outlast Home Depot Lumber

If you are planning a DIY sauna, it is natural to compare a custom sauna kit with lumber from a local building-supply store. At first, big-box boards can look like the lower-cost option. The difference often shows up later, when you begin sorting, cutting, fitting, trimming, and trying to make general-purpose material perform inside a high-heat room.

A sauna asks more from wood than most home projects. Every board has to handle heat, moisture, expansion, contraction, and regular contact with bare skin. That is why the true cost of quality is not measured by the cheapest board on the shelf. It is measured by how well the materials install, how comfortably they perform, and how long the finished sauna holds up.

The Cheapest Board Is Not Always The Lowest-Cost Sauna Material

The price on the shelf is only one part of the cost. When you build a sauna, you also pay for sorting, cutting, fitting, trimming, waste, delays, and the long-term performance of the finished room.

Big-box lumber can make sense for many home projects, but a sauna is a demanding environment. If boards are warped, knot-heavy, inconsistent, rough, or unsuitable for high heat, the savings can disappear quickly. You may need to buy extra material, reject imperfect boards, make more cuts, or spend additional time trying to create a clean interior finish.

The lowest-cost sauna material is the material that performs correctly once it is installed. It should fit cleanly, feel comfortable to the touch, handle repeated heat cycles, and help the room look and function the way a traditional sauna should.

When you compare loose lumber with a sauna kit, compare the full project cost rather than the board price alone. A better material package can reduce waste, simplify installation, and help avoid the cost of fixing problems after the sauna is built.

custom sauna kit

Sauna Lumber Has To Perform In A Harsher Environment

Sauna lumber has a harder job than ordinary interior lumber. It has to stay stable through repeated heat cycles, handle moisture, and remain comfortable against skin when the room is hot.

Inside a sauna, wood expands, contracts, dries, and reabsorbs humidity again and again. Small material issues become more noticeable in that environment. A board that looks acceptable in a garage or basement project may cup, gap, splinter, or release resin once it is exposed to sauna conditions.

This matters most in the places you touch. Benches, backrests, and wall boards near seating areas should feel smooth, solid, and comfortable. Knots, rough grain, sap pockets, and inconsistent milling are not minor details when your skin is in direct contact with the wood.

Good sauna lumber should be selected for:

  • Heat stability
  • Moisture resistance
  • Smooth surface quality
  • Low resin or sap risk
  • Clean tongue-and-groove fit
  • Comfortable contact with bare skin
  • Long-term resistance to cupping, warping, and gaps

A sauna interior is simple in appearance, but demanding in use. Choosing lumber for that environment from the start helps the room heat better, age better, and feel better every time you use it.

custom sauna kit

Why Clear Western Red Cedar Matters

Clear Western Red Cedar gives a sauna the balance of comfort, durability, and traditional character that ordinary interior lumber often cannot provide. It is light, stable, naturally aromatic, and well suited to a room that moves through repeated cycles of heat and cooling.

Its biggest advantage is how it feels in use. Cedar stays more comfortable to the touch than many denser woods, which matters on benches, backrests, and the lower sections of wall where people naturally lean or sit. Clearer boards also create a cleaner finish, with fewer visual interruptions and fewer problem areas to work around during installation.

Western Red Cedar offers several practical benefits:

  • Comfortable feel in high heat
  • Natural resistance to moisture and decay
  • Pleasant, recognizable sauna aroma
  • Stable performance with less movement
  • Clean appearance with fewer knots
  • Lightweight handling during installation
  • Traditional look suited to indoor saunas

In a sauna, Clear Western Red Cedar helps the room feel warmer, cleaner, more comfortable, and more traditional from the first heat-up onward.

custom sauna kit

Where Big-Box Lumber Can Add Hidden Costs

Big-box lumber can look like the cheaper path until you start building with it. The extra cost usually appears in time, waste, rework, and the compromises needed to make general-purpose boards fit a sauna interior.

The hidden costs often include:

  • Extra time spent sorting and selecting boards
  • More waste from rejected or damaged pieces
  • Additional cutting, trimming, and fitting
  • Inconsistent board thickness or tongue-and-groove profiles
  • More visible joints from shorter stock
  • Rougher surfaces that need extra sanding
  • Delays from sourcing trim, vents, benches, and accessories separately
  • Possible replacement costs if boards move, gap, or become uncomfortable after use

When you factor in labour, waste, fit, and long-term performance, the lowest shelf price is not always the lowest project cost.

What A Home Sauna Kits Material Package Solves

A sauna comes together best when the materials are chosen for the room, not gathered one piece at a time. Once you account for cedar, bench material, trim, vents, vapor barrier, lighting, heater options, door style, and layout details, the value of a coordinated package becomes clearer.

At Home Sauna Kits, we build our DIY sauna kits around the details of your project. Your room dimensions, ceiling height, door location, bench requirements, and heater needs all affect the materials that belong in the final package. Instead of starting with loose lumber and making it work, you start with sauna-specific materials selected for the way the room will be built and used.

Our kits include Western Red Cedar interior materials, tongue-and-groove boards for the walls and ceiling, cedar bench components, foil vapor barrier, vents, trim, and sauna-rated lighting. Doors, heaters, controls, and other upgrades can be matched to the project depending on your layout and preferences.

The goal is simple: build once with materials chosen for the heat, the moisture, the room, and the people who will use it. A proper sauna should feel intentional from the first board to the first heat-up. When the materials work together from the start, the installation is easier to manage, waste is reduced, and the finished room is more likely to perform the way a traditional sauna should.

A Guide to Building an Authentic DIY Indoor Sauna

A successful indoor sauna starts with the experience you want to create. Before you choose a room, order materials, or compare heaters, decide what “authentic” means for your build.

In a traditional sauna, heat comes from a properly sized sauna heater and a bed of stones. The room is lined with suitable wood, the benches place you where the heat is strongest, and ventilation keeps the air fresh during use. When water is added to the hot stones, the room produces löyly: the wave of heat and humidity that gives sauna bathing its traditional feel.

This guide walks you through the main decisions behind that kind of sauna. You will need to choose the right indoor space, prepare the room envelope, select durable sauna materials, size the heater correctly, plan airflow, and design the benches and finishing details around comfort and safety.

If each part is planned together, a DIY indoor sauna can feel natural, efficient, and built to last.

Choose and Plan the Indoor Space

The best indoor sauna location is the one you will actually use. A sauna tucked into an awkward corner of the house may look good on a floor plan, but daily use depends on simple things: easy access, a nearby shower, a place to cool down, and enough room to sit comfortably without feeling boxed in.

Basements, home gyms, garage interiors, cottage rooms, and bathroom-adjacent spaces can all make strong candidates. What matters is whether the space can support the build. You need room for framing, insulation, a foil vapor barrier, cedar lining, benches, ventilation, lighting, and a properly sized heater. You also need a practical path for electrical work, especially if you are using an electric sauna heater.

Start with the way you want to bathe. If the sauna is mainly for one person, a compact layout may be enough. If you want room for two people, family use, or the option to lie down, plan for longer benches and more open floor space. Do not size the room only by what can physically fit. A sauna that is too large takes longer to heat and costs more to finish, while a room that is too tight can limit bench height, heater clearance, and comfort.

A good indoor sauna feels intentional. It should be close enough to your routine that using it feels natural, with enough space around it for changing, showering, cooling down, and drying the room after use. Once you have the right location and layout, the rest of the build becomes much easier to plan.

DIY indoor sauna

Build The Room Envelope Correctly

The cedar you see is the finish, but the room behind it determines how the sauna performs. A well-built envelope holds heat, manages moisture, supports the heater, and gives the interior boards a stable structure to attach to.

Start with a properly framed room. The walls and ceiling should be square, solid, and ready for insulation before any sauna lining goes in. Pay close attention to the ceiling, where the hottest air collects. If the ceiling is under-insulated, the sauna may heat slowly, feel uneven, or demand more from the heater than necessary.

Insulation comes next. The goal is to keep heat inside the sauna rather than letting it drift into surrounding rooms or unfinished spaces. After insulation, install a foil vapor barrier on the warm side of the wall assembly. This layer helps reflect heat back into the room and helps protect the framing from warm, moist air. Seams, corners, and penetrations should be handled carefully because small gaps can become long-term performance issues.

Before the cedar goes up, confirm every hidden detail:

  • Heater wiring and control location
  • Lighting placement
  • Vent locations
  • Bench support blocking
  • Door rough opening
  • Heater clearances
  • Any required electrical or building-code details

This is the point where careful planning saves frustration. Once the cedar tongue-and-groove is installed, changes become slower, messier, and more expensive.

Think of the room envelope as the sauna’s working shell. When the framing, insulation, vapor barrier, wiring, and blocking are planned together, the finished sauna feels tighter, heats more efficiently, and stands up better to years of use.

DIY indoor sauna

Select the Wood, Heater and Ventilation

The wood, heater, and ventilation system determine how the sauna feels, how efficiently it heats, and how well it holds up over time.

Choose wood that is made for sauna conditions. Interior boards need to handle heat, moisture, and repeated expansion without becoming uncomfortable to touch. Western Red Cedar is a strong choice for traditional indoor saunas because it is stable, durable, aromatic, and comfortable in high heat. Use tongue-and-groove boards for the walls and ceiling, with smooth, suitable stock for benches and supports.

Size the heater to the room. Start with cubic footage, then account for glass, exterior walls, ceiling height, and colder surrounding spaces. An undersized heater may struggle to reach temperature. An oversized heater can heat unevenly or cycle too aggressively. For most indoor residential saunas, an electric heater is the simplest and most practical option.

Plan ventilation before the cedar goes up. Good airflow keeps the room fresh, helps distribute heat, and allows the sauna to dry after use.

Key decisions include:

  • Wood species and grade
  • Wall and ceiling board profile
  • Bench material
  • Heater type and size
  • Control location
  • Sauna stone capacity
  • Intake and exhaust vent locations
  • Glass area and heat-loss impact

These choices work together. Good wood needs the right heat source, and the right heater needs proper airflow. When all three are matched to the room, the sauna feels balanced, heats efficiently, and performs reliably.

DIY indoor sauna

Plan Benches, Door, Lighting, And Accessories

The finishing details decide how comfortable the sauna feels in daily use. Benches, door placement, lighting, and accessories should be planned with the same care as the heater and cedar.

Start with the benches. Heat rises, so the upper bench is where the sauna experience is strongest. Make sure the layout gives you enough depth to sit comfortably, enough length to stretch out if desired, and safe clearance from the heater.

Choose a sauna door that suits the room. Glass can make a compact sauna feel more open, while a cedar-lined door gives a more traditional look. The door should open outward and be placed where it will not interfere with benches or heater clearances.

Keep lighting simple, warm, and sauna-suitable. Add practical accessories last:

  • Heater guard
  • Thermometer
  • Bucket and ladle
  • Backrests
  • Vents
  • Floor matting

A well-planned interior should feel easy to enter, comfortable to sit in, and simple to use.

Use A Sauna Kit To Simplify The Build

A sauna kit helps turn your plan into a coordinated build. Instead of sourcing cedar, bench material, trim, vents, doors, heater options, and accessories from separate suppliers, you can start with materials selected for your room and intended sauna layout.

At Home Sauna Kits, we build our DIY indoor sauna kits around your dimensions, ceiling height, bench layout, door location, and heater needs. Our kits use Western Red Cedar interior materials, with bench components, ventilation pieces, trim, and optional sauna doors and heaters matched to the project.

You still need a properly framed, insulated, and wired room, but we help simplify the sauna-specific side of the build. When your materials are planned together from the start, the project becomes easier to manage, easier to install, and more likely to feel right when the sauna reaches temperature.

Custom vs. Pre-Fab: Why Architectural Kits Beat Box Units

A custom-built sauna offers a level of personalization and quality that pre-fabricated units simply cannot match. Why settle for a one-size-fits-all solution? In this guide, we lay out the entire journey for you, covering everything from initial design concepts and cost considerations to selecting the right materials and unique features. Think of it as your blueprint for creating a personal wellness sanctuary tailored to your space and lifestyle. Not a compromise.

You’ve seen the standard sauna boxes, those plug-and-play units promising a simple solution. But they often feel like an awkward compromise (and a pretty clumsy one at that) shoved into a corner. They are defined by limitation.

What if your sauna wasn’t just another appliance, but a seamless architectural feature designed specifically for your home? At Home Sauna Kits, this is the core of our philosophy. We see a custom sauna as a permanent upgrade, a true sanctuary that can enhance your property’s value while becoming a cornerstone of your personal wellness routine. When we talk about ‘custom’ solutions, we help you select the right kit size for your unique space – often recommending a larger kit to ensure you have ample lumber for unusual configurations. 

We’ll provide detailed guidelines for adapting our materials to angled walls, low-ceiling basements, or tricky corners. Whether you’re converting a spare bedroom, utilizing an awkward under-eave space, or building around structural posts in your garage, our expert guidance helps you make our standard kits work beautifully in your specific situation. 

It’s a space built for you.

So, where do you even start? We created this guide to be your roadmap, walking you through the entire process. We’ll cover the big questions, from initial design concepts and what materials to choose, to the realistic costs involved. We also explore those special features (the fun part) that elevate a simple hot room into a true personal retreat. Seeing how it all comes together is the best way to get started on the right foot.

The Custom Sauna Design & Build Process: A Step-by-Step Blueprint

Understanding how it all comes together begins with our collaborative blueprint, a refined process designed to eliminate guesswork and deliver on your vision.

So, what is a custom sauna really going to cost? The honest answer is that the final number hinges entirely on your choices.

The physical size is the most obvious starting point, but other factors quickly come into play: your choice of heater, the decision to build it yourself or hire a professional, and of course, all the custom features like glass walls, ambient lighting, or sound systems that make the space uniquely yours.

Mid-range projects with more glass will climb higher, while high-end saunas with premium materials and advanced features represent a more significant investment.

While one of our architectural kits often has a higher upfront cost, the real return is measured over the long haul in durability and a better sauna experience. This isn’t just about buying an appliance.

It’s an investment.

You are adding a permanent fixture to your house, something that actually enhances its value. A huge part of that lasting worth comes directly from the materials themselves, which makes your choice of wood (and this is key) one of the most critical decisions in the entire process.

Choosing Your Foundation: A Comparison of Popular Sauna Wood Types

That investment in your home’s value begins with the single most important choice you’ll make for a custom-built sauna. The wood.

It’s so much more than a building material.

At Home Sauna Kits, we believe the wood is the soul of your sauna. It defines everything from its distinct aroma and long-term durability to the actual atmosphere you’ll feel every time you step inside.

Powering Your Heat: Sauna Heater Options Explained

And if the wood is the soul of your sauna, the heater is its heart.

It’s the engine. The thing powering your entire experience. Choosing the right one isn’t about finding what’s “best” in some objective sense. The real goal is to match the heater to the wellness ritual you want to create for yourself.

Traditional Electric Heaters

For many, this is the classic Finnish experience. An electric heater gets a compartment of stones piping hot, and you create the steam (the Finns call it löyly) by ladling water over them. The result is a powerful wave of heat that purifies and relaxes.

It’s an intense feeling.

We consider these units absolute workhorses, perfect for anyone who craves that deep, traditional sweat. That said, the only trade-off is the warm-up period; you’ll need to plan for 30 to 60 minutes to bring the room to full temperature. Their energy consumption is right where you’d expect for this kind of power. And the upkeep is wonderfully simple, mostly just checking the heating elements and swapping out the rocks every few years.

The Build Approach: DIY Sauna Kits vs. Professional Installation

Once you’ve decided on the heating system, the next question comes into focus. The build itself. This choice often comes down to your budget, your timeline, and your comfort with a toolbox.

Our pre-cut architectural kits are a perfect match for the confident DIYer.

You get the immense satisfaction of building it with your own two hands, and you save a substantial amount of money in the process (when compared to a professional installation).

Making the Most of Your DIY Journey

The beauty of our pre-cut kits lies in their forgiving nature. Every piece is clearly labeled, and our assembly guides include detailed photographs for each step. Most DIY builders complete their sauna over two weekends, though there’s no rush – the process itself becomes part of the experience. We maintain an active community forum where builders share tips, troubleshoot challenges, and celebrate their completed projects. Common questions about electrical connections, vapor barriers, and door alignment are all addressed in our comprehensive support materials. Plus, our technical team is just a phone call away when you need that extra reassurance.

Beyond the Box: Inspirational Design & Customization Features

But the real magic of a custom kit isn’t just about the savings.

What it’s really about is creative freedom. Your freedom. It’s the opportunity to design a sauna that perfectly aligns with your vision, escaping the limitations of a generic, pre-made box. Maybe that means a wall of glass offering an uninterrupted view of your garden, or it could be multi-level floating benches that lend the space a clean, modern aesthetic.

Sound good? What this means in practice is you can tailor almost anything. We regularly help our customers bring their unique ideas to life, and some of the most popular customizations include:

  • Expansive panoramic glazing, with some clients choosing a full glass front to really open up the space.   
  • More social bench layouts (like L-shaped or U-shaped designs) that make conversation natural and easy.  
  •  Integrated technology meant to create an atmosphere, from subtle backrest lighting and chromotherapy to a fully integrated Bluetooth sound system.   
  • Combining different wood types. This creates a unique interior finish that you simply won’t find anywhere else.

This kind of personalization elevates your sauna into a true architectural feature of your home. A feature that needs to be thoughtfully placed for maximum impact.

The only real question is, where will your personal oasis live?

Location, Location, Location: Indoor vs. Outdoor Sauna Considerations

Deciding on that perfect spot involves some practical planning. You can’t just place a sauna anywhere, but that’s precisely why our architectural kits are engineered to give you the flexibility needed to create your ideal space.

Bringing your sauna indoors requires a bit of planning. Good ventilation is your first priority; it has to manage all that steam and moisture. You also need the right foundation. Waterproof flooring, like tile or even sealed concrete, is essential. And then there’s the power. A dedicated electrical circuit specifically for the heater isn’t just a good idea; it’s a critical safety requirement for any installation we stand behind.

Key Takeaways: Building Your Perfect Sauna Sanctuary

Choosing a custom built sauna is more than an investment in your home; it’s a genuine investment in your well-being.

It’s a decision for quality.

The difference between a standard box unit and an architectural kit really boils down to control. Your control. This approach empowers you to achieve a perfect fit for your specific room, beautifully match your home’s aesthetic, and select the exact heat experience you’ve always wanted (rather than just settling for a pre-packaged option).

At Home Sauna Kits, we believe your sanctuary should be built without compromise.

Ready to begin? You can explore our gallery of custom projects for inspiration or contact our team to start your design consultation today.

Custom Cedar Benches: Maximizing Space in Your Sauna Layout

Custom sauna benches are the cornerstone of a truly personalized and comfortable home sauna experience. This comprehensive guide will walk you through everything from choosing the right wood and designing the perfect layout to building the benches yourself. Discover how to elevate your sauna from standard to spectacular.

The secret separating a good sauna from an unforgettable one often comes down to the benches. They are the physical heart of your wellness space. They directly shape your comfort, the room’s visual flow, and even how effectively the heat works its magic. Yet, too often, standard benches impose limitations, forcing a one-size-fits-all approach onto what should be a very personal retreat.

Custom sauna benches from Home Sauna Kits transform this limitation into an opportunity, allowing you to design a space that truly reflects your needs and preferences. When we say ‘custom,’ we mean we work with you to find the perfect solution.

We’ll help determine if you need one of our larger kits to ensure sufficient lumber for your unique room dimensions, extra-wide benches for lounging, or wraparound seating for corner installations. 

Our team provides expert recommendations on kit sizing and detailed instructions for adapting materials to challenging spaces. Whether you’re working with an oddly-shaped basement alcove, converting a walk-in closet, or maximizing an attic space with sloped ceilings, we guide you through modifying our standard benches to achieve the perfect fit.

Choosing the Right Wood: A Detailed Material Comparison

The wood for your sauna benches has a tough job to do. It has to endure wild swings in temperature and humidity, all without warping, splintering, or showing any signs of rot. That said, the most critical property is thermal conductivity, which keeps the bench surface from getting too hot to sit on, even at the sauna’s peak. The material must be durable and smooth. And completely non-resinous. Nobody wants to deal with sticky sap.

Western Red Cedar

Cedar is the classic choice, and there’s a good reason for that. When you heat Western Red Cedar, it fills the room with that pleasant, aromatic scent so many people associate with a traditional sauna experience. It’s an unmistakable smell. But the appeal runs far deeper than just the wonderful fragrance; the wood’s natural oils also provide amazing resistance to moisture and decay. What this means is you get a durable, long-lasting material that performs beautifully for years. A fantastic all-around performer.

At Home Sauna Kits, we’ve carefully selected cedar as the primary wood for our custom sauna kits, informed by years of experience and customer feedback. We understand that when you’re investing in a sauna, you want materials that not only perform exceptionally but also create the authentic experience you’re seeking. Cedar consistently delivers on both fronts, which is why it’s become the cornerstone of our product line. Our kits feature premium-grade cedar lumber that’s been specifically dried and milled for sauna use, ensuring optimal performance from day one.

Ergonomics and Safety: Designing Your Bench Layout

This is where the bench layout comes in. It’s the point where pure comfort and smart function truly meet. We believe an ergonomic design isn’t some luxury feature. It is the very thing that makes those long, relaxing sauna sessions possible. After all, you can’t unwind if you’re uncomfortable.

In our experience, a two-tier bench system is almost always the most effective layout. It’s a design built on a simple principle. Hot air rises. Having a lower bench offers milder heat to ease into a session, while the upper bench places you in the warmest part of the room (where you can feel its full effect). This dual-level approach puts you in complete control of the intensity of your session.

Let the room’s shape be your guide. For square rooms, we find that an L-shaped configuration works best, creating a very efficient and sociable space. After you settle on a layout, the conversation naturally turns to cost. 

Cost Analysis: Budgeting for Your Custom Benches

Understanding the costs is the next step after settling on a layout. Your total investment in custom benches hinges on four primary factors: wood type, sauna size, design complexity, and labor.

We see projects fall into one of three main budget scenarios. A full DIY approach keeps your expenses down to just the cost of materials. A great choice if you’re handy. Pre-fabricated bench kits, on the other hand, offer a balanced middle ground between cost and convenience (a very popular route). The third option is a fully custom professional installation, which provides a turnkey solution that naturally comes at the highest price point. 

Design Inspiration Gallery

See how an L-shaped layout in beautiful Clear Cedar maximizes corner space. It’s a smart, classic approach. For a modern feel, ‘floating’ benches with hidden supports and subtle under-bench LED lighting create a clean, hovering effect. You can achieve a striking look by mixing materials; the warm tones of cedar benches provide a beautiful contrast against rich, dark-stained hemlock walls, creating a sophisticated interplay of light and shadow. This combination not only adds visual interest but also helps define different zones within your sauna space.

Consider incorporating built-in headrests carved from matching cedar for enhanced comfort during longer sessions. Some have created stunning focal points by adding a backlit salt wall panel behind the upper bench, combining the therapeutic benefits of halotherapy with the visual warmth of Himalayan salt. Others have opted for custom bench cutouts that accommodate the heater placement while maintaining clean sight lines throughout the space. These thoughtful design choices transform a functional sauna into a true wellness sanctuary.

Maintenance and Long-Term Care for Your Benches

Your new benches will be a centerpiece of your sauna, so you’ll want to keep them looking pristine and hygienic. The whole process is simpler than you might think. After each session, just give the wood a quick wipe with an absorbent towel to handle the immediate moisture. A single, simple step. We recommend a deeper clean about once a month. For this, you’ll just need a soft brush and a mild soap-and-water solution (specialized sauna cleaners work great, too) to gently scrub the surfaces.

There is one thing you absolutely must avoid, though: any kind of harsh chemical. They not only cause lasting damage to the wood, but, more importantly, their fumes and residues undermine the pure, natural environment that is so central to the entire sauna experience. And getting that environment right is all about the details. This is why we believe something like custom benches becomes much more than just seating; it is a defining investment in your personal comfort and the sauna’s lasting beauty.

Why? Because those cleaners can cause lasting damage to the wood and, more importantly, completely undermine the pure, natural environment that is so central to the sauna experience.

Why Choose Home Sauna Kits for Your Custom Cedar Benches

With nearly five decades of expertise, we’ve been pioneering DIY sauna solutions since 1974. Founded by Finnish-Canadian sauna expert Bert (Pertti) O. Jalasjaa, our company has helped over 65,000 customers build their dream saunas across 28 countries. As one of North America’s oldest and most trusted sauna manufacturers, we bring authentic Nordic traditions combined with modern innovation to every project. Our comprehensive DIY kits include premium 11/16″ thick Western Red Cedar, commercial-grade heaters, and everything needed to transform any space into a wellness sanctuary. 

What sets us apart is our commitment to customization, we don’t just ship pre-fabricated boxes, but engineer solutions that perfectly fit your unique space and vision. With factory-direct pricing, expert guidance, and the backing of “The Art of Sauna Building” (now in its 11th edition), we make professional-quality saunas accessible to everyone. Our dedicated team provides unmatched support throughout your building journey, ensuring your custom bench project becomes a lasting investment in wellness and relaxation. When you choose Home Sauna Kits, you’re not just getting materials, you’re gaining a partner with the knowledge and experience to help you create the perfect sauna sanctuary.

Key Takeaways: Building Your Perfect Sauna Sanctuary

Getting that pure, natural environment right is all about the details. This is why something like custom benches becomes more than just seating; it’s a defining investment in your personal comfort and the sauna’s lasting beauty.

It’s your sanctuary, after all.

You have the framework now. You know how to approach those big decisions, from picking the right wood to designing a layout that fits, and can properly weigh if a DIY build or a professional installation is the smarter path for you. What was just a dream for an ideal retreat is finally becoming a real plan. A tangible one.

When you feel ready to move forward, we invite you to explore our complete sauna kits. And if you want some expert advice tailored to your specific project, our team is always here to help. 

The Ultimate Guide to Designing Your Custom Home Sauna Layout

Building a custom home sauna means turning a personal space into your own sanctuary for wellness and relaxation. A real retreat. But the process can feel overwhelming, so we’ve put together this guide to help you navigate every step. We’ll show you how to move from initial design concepts and material selection right through to understanding the costs and preparing your home for installation.

Imagine a sauna that fits perfectly into that unused corner of your home. For many, this sounds like a complex luxury. An out-of-reach project.

But we see it differently. We believe it’s an achievable investment in your daily wellness, and at Home Sauna Kits, we want to help you create this space for yourself. When we say ‘custom,’ we mean we’ll help you choose the right kit size for your unique space, often recommending a larger kit to ensure you have enough lumber for special configurations. 

We provide detailed guidelines for adapting our materials to challenging spaces such as under-stair alcoves, attic rooms with sloped ceilings, or converted walk-in closets. 

Whether you’re working with an L-shaped basement corner, a narrow utility room, or want to maximise a compact 4×4 space with floor-to-ceiling benches, our expert guidance helps you modify our standard kits to fit your specific needs.

This guide is here to demystify the entire build.

We will break down every single decision, covering initial design concepts, material selection, budgeting, and the final installation. Building your dream sauna starts with a clear plan.

Choosing Your Foundation: A Guide to Sauna Wood Types

The wood is the soul of your sauna.

We really mean that. The wood choice is about so much more than looks, defining everything from the room’s unique aroma to how it handles constant moisture. It also determines how hot the benches actually feel against your skin. A surprisingly important detail. Each wood species brings a distinct personality to the space, making the experience yours alone. 

At Home Sauna Kits, we’ve chosen Western Red Cedar as our primary wood for good reason. After decades of experience and thousands of installations, we’ve found it delivers the perfect combination of performance, beauty, and that authentic sauna experience our customers love. Its rich, aromatic scent transforms every session into a sensory journey, while its natural oils provide unmatched moisture resistance and longevity. The wood stays remarkably cool to the touch even at high temperatures, ensuring your comfort throughout every session.

With the foundation chosen, it’s time to select its heart. The next step is to power your heat with the right sauna heater.

Powering Your Heat: Selecting the Right Sauna Heater

The heater is the engine of your sauna. It defines the entire experience.

Electric heaters provide modern convenience with very precise temperature control. Our models also let you generate that rich, wonderful steam (the Finns call it löyly) just by ladling water over the heated rocks, blending the traditional with the new.

Once you have decided on the core heating element, you can focus on personalising everything else around it.

Personalising Your Sanctuary: Endless Customisation Options

True customisation lives in the details. 

We believe the bench layout really defines the experience. A simple, clean single-tier design is a fantastic starting point. But what if you’re picturing a more social, L-shaped configuration for conversation? Many of our customers also love the classic versatility of multi-level seating.

Lighting transforms the mood entirely.

You can create a soft ambience with subtle backrest LEDs or install a full chromotherapy system for its therapeutic glow. To achieve that modern, open aesthetic, consider an all-glass door or even a full glass front wall, which is a truly stunning choice.

Then you have the final touches that pull the whole thing together, from Wi-Fi-enabled digital controls to integrated speaker systems. Don’t forget premium backrests for real comfort. Once your ideal design is finalised, it’s time to prepare the specific site for your sauna’s arrival. 

Preparing Your Space: A Pre-Installation Checklist

Now that your design is finalised, a little site prep goes a long way. It’s the key to a smooth installation. Here is our checklist to help get your space ready.

We always start from the ground up: the floor. The surface has to be waterproof and non-slip, so materials like concrete, tile, or vinyl work perfectly. Just no carpet. Ever. Once that’s handled, you need to confirm the space is framed exactly to the dimensions we specify in your kit’s instructions, as this is the only way to ensure a perfect, snug fit.

Power is critical.

Our electric heaters require their own dedicated 240V circuit, and we are firm on this point: please hire a licensed electrician for the installation. This is purely a safety requirement. That same professional can also advise if your project needs a local permit, something that’s frequently required for new backyard structures or this type of electrical work.

Let’s not forget about the air you’ll be breathing. Healthy circulation inside your sauna hinges on proper ventilation, meaning you need correctly placed intake and exhaust vents to keep things fresh. This isn’t something you can skip.

Getting these foundational elements right is the first true step toward safe, rewarding sessions.

Sauna Use, Safety, and Health Insights

With your sauna now built, understanding how to use it safely is what unlocks its real benefits.

For traditional saunas, we have a principle we call the ‘200 Rule’. The idea is simple. The temperature in Fahrenheit plus the relative humidity percentage should not exceed 200. Following this guideline helps you create an environment that is both comfortable and powerfully effective.

So what’s happening inside your body during a 30-minute session? Your heart rate elevates to a level that mimics a brisk walk. This is a clear sign your body is working hard, trying to cool itself down through heavy sweating. Your muscles begin to relax. Many people also report a distinct sense of calm (some say a gentle euphoria), a feeling we believe is linked to the body’s natural release of endorphins.

For specific health questions, like how sauna use might affect a condition such as Hashimoto’s, your physician is the right person to consult. Everybody is different, after all. Thinking about how you will personally use your sauna helps inform its final design, and we find that seeing how these different elements come together in real-world examples is often the best source of inspiration.

Why Choose Home Sauna Kits for Your Project

At Home Sauna Kits, we’ve been helping customers create their perfect wellness retreats since 1974. Our expertise comes from over 65,000 successful installations across 28 countries, making us one of North America’s most trusted sauna manufacturers. We understand that every project is unique, which is why we don’t just sell pre-fabricated boxes, we engineer complete solutions tailored to your specific space and vision.

Our comprehensive DIY kits include premium 11/16″ thick Western Red Cedar, commercial-grade heaters, and all the components needed for your interior build. What sets us apart is our commitment to customisation combined with factory-direct pricing. We bundle everything together, providing exclusive discounts that individual sourcing simply can’t match. 

Our founder, Finnish-Canadian sauna pioneer Bert (Pertti) O. Jalasjaa, literally wrote the book on sauna building: “The Art of Sauna Building” is now in its 11th edition and remains the industry’s definitive guide. When you work with us, you’re not just getting materials; you’re gaining access to decades of expertise and a dedicated team that supports you throughout your entire building journey. We help transform your vision into reality, ensuring your custom sauna becomes a lasting investment in wellness and relaxation.

Transform Your Vision Into Reality

Building a custom home sauna is more than a home improvement project; it’s an investment in your daily wellness and quality of life. With the right planning, materials, and expert guidance, what might seem like a complex undertaking becomes an achievable and rewarding journey.

We’ve walked you through every crucial decision, from selecting the perfect wood species to choosing your ideal heater type, designing ergonomic layouts, and preparing your space for installation. Armed with this knowledge, you’re ready to create a sanctuary that perfectly fits your home, lifestyle, and wellness goals.

At Home Sauna Kits, we’re passionate about making the authentic sauna experience accessible to everyone. Our custom design process ensures that your unique vision becomes a beautifully crafted reality, backed by nearly 50 years of expertise and the highest quality materials available.

Ready to begin your sauna journey? Explore our complete DIY sauna kits or contact our expert team at 1-800-519-5753 for personalised guidance. Let us help you build not just a sauna, but a personal wellness retreat that you’ll treasure for years to come.

Why Does an Electric Sauna Heater With Rocks Offer the Best Steam Experience

An electric sauna heater with rocks is the heart of a traditional Finnish sauna, providing the thermal mass necessary for authentic “löyly.” This guide explores heater sizing, rock types, and installation tips to help you achieve the perfect steam session.

Infrared cabins offer convenience, but they often miss the soul of the Finnish tradition. That visceral hiss of water striking hot stone that an electric sauna heater with rocks achieves.

At Home Sauna Kits, we know this as löyly. It is a sudden wave of soft humidity that envelops you, turning dry heat into a breathable, cleansing experience that light panels simply cannot replicate. While our units rely on electricity for consistent power, the stones provide the essential thermal mass. They store intense heat and release it on command. Without them, you are merely sitting in a warm box. With them, you actively control the climate. However, the quality of that steam depends entirely on the specific geology sitting atop your heating elements.

The Science of Sauna Stones: Why Material Matters

Think of the stones as a thermal battery. They absorb the harsh, direct energy from electric heating elements and convert it into radiant warmth.

That is why sauna heaters have rocks. Without them, the heat feels sharp and aggressive.

But you cannot simply gather stones from your garden to fill the tray. The geology is critical. We rely on igneous rocks, particularly Peridotite, because of their heavy density and ability to withstand thermal shock. When you pour cold water on a red-hot rock, it undergoes massive physical stress. That is a lot to ask of a stone. Porous rocks or river stones often contain trapped moisture. When heated, that internal water turns to steam and expands.

The rock doesn’t just crack. It explodes.

For safety and performance, we stick to proven sources. Finnish Peridotite (igneous) sauna stones are typically used. These dense stones hold heat long after the elements cycle off. It keeps the room stable. This thermal mass is the foundation, but how you manipulate that heat defines the session.

Mastering the Steam: Water, Humidity, and the 200 Rule

Ideally, your session involves more than just sitting in a hot, dry box. It requires steam.

Achieving that signature “soft heat” starts before you even turn the dial. It begins with loading the stones. You cannot simply dump rocks into the heater cavity. We recommend stacking them loosely. 

Electrical Requirements, Installation, and Efficiency

While many customers hope for a simple 120V connection, similar to a standard household outlet, those units generally lack the amperage to heat a rock-filled cavity effectively.

Real steam requires power.

Standard wall outlets just won’t cut it. For most legitimate setups, you are looking at a dedicated 240V circuit that must be hardwired directly into your panel. We cannot stress this enough. Hiring a licensed electrician is mandatory. They are the only ones qualified to determine variables like the correct wire gauge and breaker size (which depend entirely on the heater’s kilowattage and the run length from your main panel).

But do electric saunas use a lot of electricity?

The consumption profile is distinct. The unit draws maximum power during the “heat-up” phase, which typically takes 30, 45 minutes for 4.5kW to 9kW heaters to reach temperatures exceeding 160°F. Once the rocks are saturated with heat, the elements cycle off. They only engage intermittently to maintain the set temperature, meaning the actual draw during your bath is significantly lower than the startup spike.

Of course, raw power is only useful if you can regulate it precisely.

Modern Controls and Essential Safety Features

That level of precision used to involve getting down on your hands and knees.

You had to twist a mechanical dial located right at the base of the heater. While those traditional manual thermostats are reliable, true workhorses in the industry, the user experience has evolved significantly. Now, many electric heaters pair with external digital keypads or Wi-Fi-enabled apps.

This changes how you use the sauna. Imagine triggering the pre-heat cycle while you are still sitting at your desk at work. By the time you step through your front door, the rocks are fully saturated. No waiting around in a cold room. Just heat.

But convenience falls flat without safety. Generating that much intensity implies that physical protection is non-negotiable. At Home Sauna Kits, we always emphasize the importance of heater guards. These simple wooden rails create a necessary barrier around the unit (a literal buffer zone), ensuring you don’t accidentally brush your leg against hot metal.

Some advanced models go even further. They utilize engineered “cool-touch” casings that remain safe to handle, even while the interior elements are blazing.

Installation specifics are just as critical. You cannot simply place a heater wherever it fits the room’s aesthetic; strict safety clearances must be maintained between the unit, the walls, and the benches to prevent scorching. Or fire hazards. These distances aren’t suggestions. They are requirements.

Almost all residential electric heaters come equipped with an auto-shutoff feature, usually set to a strict 60-minute limit. The system powers down automatically.

It acts as a safety net.

Health Benefits and Optimal Temperature Settings

As soon as that heat wraps around you, your physiology shifts gears. Your heart rate ticks up. Blood vessels open wide.

It can be surprising to realize that spending just 30 minutes inside engages your cardiovascular system much like a moderate jog would, pushing oxygen-rich blood all the way to your extremities while loosening up tight muscles.

For most people, we generally recommend aiming for a temperature range between 160°F and 190°F. Think of this as the sweet spot for a traditional bath. At these levels, an electric heater (provided it’s loaded with the correct volume of rocks) generates a soft, radiating heat that manages to penetrate deep into your tissue without actually stinging your skin. It feels intense. But manageable.

That said, you shouldn’t just sit there indefinitely.

The most effective routine involves cycles. We recommend heating up for 10 to 15 minutes, taking a breather to cool down, and then returning to the heat. That temperature fluctuation triggers the deep sweat necessary to flush out impurities. We often get asked exactly how long the detox process takes, but the reality is that real benefits come from consistency. Not a single marathon session.

The sweat is what carries away the junk. That said, replenishing fluids is critical. You lose water rapidly in there. We always tell our customers that hydration must be part of the ritual itself. Eventually, as your pulse returns to normal and the endorphins settle in, that physical relief transforms into mental clarity. 

Elevating Your Home Wellness Routine

Whether you’re seeking the deep muscle relief, cardiovascular benefits, or simply that moment of mental clarity, the authentic sauna experience comes down to one crucial element: löyly. While infrared panels may promise convenience, they cannot replicate the transformative power of water meeting hot stone.

At Home Sauna Kits, we’ve built our reputation on delivering this authentic Finnish experience through carefully engineered electric heaters, premium stones, and modern safety features. From the initial electrical installation to mastering the perfect steam, every detail matters in creating that sacred space where stress dissolves and wellness begins.

The path to true sauna satisfaction isn’t found in shortcuts – it’s discovered in the hiss of steam, the radiant warmth of properly heated stones, and the ritual of cycles that have defined this practice for generations. When you’re ready to move beyond merely sitting in a warm box and embrace the full power of löyly, Contact Home Sauna Kits – we are here to guide you home.

How Can You Choose the Right Sauna Windows Canada for Safety and Aesthetics

Whether you are building a kit from scratch or upgrading an existing structure, understanding glass safety and thermal properties is vital for a successful DIY project.

Sitting in 80-degree heat while snow piles up on the evergreens outside offers a specific kind of magic. It grounds you. That visual link to nature transforms a standard sweat session into a serene retreat. Selecting the best windows among other sauna parts in Canada has to offer requires balancing the desire for a serene view with the necessity of heat retention in our distinct climate.

Before we talk framing or placement, though, we need to address safety. There is one factor that overrides everything else.

Why Tempered Glass is Non-Negotiable for Safety

Customers wonder if those sauna windows really need to be tempered. Our answer isn’t just yes. It is absolute.

Standard annealed glass, the type sitting in your living room window right now, gets cooled slowly during the manufacturing process. For a standard home environment? It works perfectly fine. A sauna, however, is a completely different animal. You are dealing with an extreme environment where the rapid fluctuation between intense interior heat and potentially freezing exterior temperatures creates thermal shock.

Ordinary glass often cannot withstand the stress involved in this constant expansion and contraction.

The result is a significant hazard.

If standard glass fails, it doesn’t just crack; it creates a dangerous situation by shattering into jagged, razor-sharp shards that pose a severe risk to anyone inside. (Imagine that happening while you are barefoot). Tempered glass is different. It is manufactured through a process of extreme heating and rapid cooling, which makes the final product four to five times stronger.

Even more critical is what happens if it actually breaks.

Instead of turning into dangerous spikes, tempered glass crumbles into small, dull “pebbles.” Most safety codes mandate this type of glazing for high-heat or wet environments for exactly this reason.

Your glass choice protects you, but the wood holding it must survive the same punishing conditions.

Choosing the Right Frame Material: The Case for Cedar

We see it happen. A DIY enthusiast eyes a standard residential window, thinking it is a clever way to shave a few dollars off the project budget.

Please, resist the temptation. Installing a vinyl frame designed for a climate-controlled living room into a 90°C (194°F) environment creates immediate issues. Under that kind of intense thermal load, vinyl tends to soften or warp. However, even more concerning is the issue of off-gassing. Heated plastic releases chemical vapors that have absolutely no place in the clean, healthy air you are trying to cultivate in a sauna.

Aluminum frames might solve the vapor problem, but they introduce a burn hazard. Metal conducts heat. Fast.

If you drift into a relaxed state and accidentally lean against an aluminum sash, the sudden shock will ruin your session immediately. These practical realities explain why we champion Western Red Cedar.

A sauna window often acts as the primary barrier between -20°C Canadian winter air outside and the blazing heat inside. You need a material with exceptional dimensional stability to handle that kind of stress. Unlike synthetics that might buckle or fail, wood frames expand and contract naturally with these radical temperature swings. This keeps the glass seal tight without losing structural integrity.

Then there is the sensory experience to consider.

Cedar resists rot and decay naturally (no harsh chemical treatments required). When the heater warms the wood, it releases that signature, rich aroma that defines a traditional sauna bath. This is an atmospheric detail that standard window materials simply cannot replicate. Aesthetically, using real wood creates a cohesive, natural look that turns a simple room into a true retreat.

Thermal Efficiency: Double-Pane vs. Single-Pane

Real cedar frames create that stunning visual border we all love. But the glass inside them? It has to perform under pressure.

Serious pressure. We see first-time builders run into trouble right here. The reality is that regular single-pane household windows just don’t belong in a project like this. Standard residential glass simply lacks the durability to handle the extreme thermal shock typical of our northern climate.

Imagine the stress placed on a single sheet of glass when it is 90°C inside your hot room and a biting -25°C outside during a Canadian winter. That temperature differential is massive. Ordinary glass can shatter under that kind of strain.

That is why at Home Sauna Kits, we almost exclusively recommend double-pane sealed thermal units.

The difference isn’t subtle. A single pane offers almost zero insulation value (R-value). It acts as a thermal bridge, funneling your hard-earned heat straight to the outdoors. Consequently, your heater has to work overtime just to compensate for the energy bleeding through the glass.

Double-pane units handle this differently. They create an insulating air pocket, a barrier that keeps the inner glass surface much closer to the actual room temperature.

You might be wondering why this touches your actual bathing experience. It comes down to protecting the löyly.

When you toss water on the rocks, you want that steam to circulate and envelop you (arguably the best part of the session). If your window is cold, the steam hits the glass and condenses right away into water droplets. It kills your humidity level. Sealed thermal units prevent this rapid condensation, keeping vapor in the air and your view clear rather than fogged over.

That said, remember that even high-quality glass insulates less effectively than a properly insulated cedar wall.

Sizing Your Window and Managing Heat Loss

Western Red Cedar holds heat. Glass moves it. Every window creates a cool surface that your heater must actively fight against to keep the room hot. If you install too much glass without adjusting your heat source, the room may never reach optimal temperatures in a reasonable time.

This is especially true during a harsh winter. You might find the heater running constantly without ever hitting the target.

At Home Sauna Kits, we follow a general rule to account for this energy transfer. For every square foot of glass, add one cubic foot to your sauna’s total volume calculation. This adjusted number is what counts; it determines the kilowatt range required for your specific build.

Say you are planning for a floor-to-ceiling panoramic view.

You will likely need to move up a heater size to accommodate it. A standard 6kW unit might struggle to maintain 90°C in a room with a full glass wall, whereas an 8kW or 9kW model can handle the load.

Finding the Balance

Maximizing glass size isn’t always the right move. Strategic sizing lets you enjoy the landscape without sacrificing efficiency. We frequently recommend standard sizes like 12″ x 48″ or 16″ x 64″.

There is a practical DIY reason for this, too. These dimensions fit neatly between standard stud bays, which makes your framing process much easier while minimizing heat loss. You get the connection to nature, but you keep the intense heat.

That said, we offer custom sizing assistance if you have a specific architectural vision that breaks the mold. Once you have determined the right size for your heater capacity, the next puzzle piece is deciding exactly where that glass belongs.

Strategic Placement for Privacy and Light

Where you position the glass defines the entire experience. You are building a retreat, not a fishbowl.

Before cutting into that fragrant Western Red Cedar, stand in the proposed footprint of your sauna and just look. If your backyard borders a busy street or a neighbor’s patio, total transparency serves the wrong purpose. Instead, orient your views strictly toward nature. When selecting sauna windows Canadian homeowners often must balance this desire for openness with the reality of suburban density.

We recommend installing long, narrow horizontal windows placed high on the wall for these situations.

Creating Your Perfect Sauna Retreat

Building a personal oasis requires balancing the rugged longevity of Western Red Cedar with the critical safety of tempered glass. But it is about more than just specs. It is about the experience.

The right windows invite natural light to wash over the interior, maintaining the warmth while connecting you to the outdoors. That balance matters.

Since 1974, we at Home Sauna Kits have guided DIYers through these exact decisions. If you need assistance selecting the right glazing or sizing a heater to compensate for the view, contact us today. We are ready to help you turn those plans into your dream sanctuary.

What Makes a Traditional Sauna Kit Worthwhile Compared to Modern Alternatives

A traditional sauna kit brings the authentic Finnish spa experience directly to your door, offering a level of heat and immersion that modern alternatives often struggle to replicate. We want to walk you through the mechanics, health benefits, and heritage craftsmanship behind these builds to show why they remain a superior long-term investment.

People have sought out the deep, penetrating heat of a sauna for over two thousand years. It is about health. Clarity. A ritual rooted in survival. At Home Sauna Kits, we understand this lineage intimately (our founder actually brought his authentic expertise directly from Finland). Since 1974, we have used that background to help homeowners create these personal escapes.

But the recent explosion in home wellness options has complicated things.

You might see infrared cabins and portable steam tents marketed right alongside true saunas, leaving many enthusiasts unsure of what actually delivers results. A DIY traditional sauna kit bridges that gap. It offers the satisfaction of building a permanent retreat without the headache of raw construction.

To understand why this method remains the gold standard, we must first look at the heat itself.

Understanding the Mechanics: How Traditional Heating Works

At the core of every kit we have designed since 1974 lies a single, governing principle. Convection. Unlike modern infrared cabins that rely on light waves to target the body directly, a traditional sauna prioritizes heating the air volume first.

This creates an immersive thermal envelope. The heat surrounds you completely.

It doesn’t matter if you install a wood-burning stove or pick one of our electric heaters. The rocks do the heavy lifting. Think of the stones in the tray as a dense thermal battery (because that is essentially what they are). They absorb heat. Hold it. Then they radiate that warmth outward, soaking the cedar walls and benches to create an ambient intensity that infrared units just can’t match.

We generally advise aiming for an ambient temperature range between 170°F and 195°F. If those numbers sound intense, keep in mind that you are starting with dry heat. The humidity naturally hovers around a low 10-20%, making the environment feel surprisingly manageable rather than stifling. 

The Ritual of Löyly: Why Steam Sets the Experience Apart

That sense of manageability shifts the moment you introduce the defining element of a traditional sauna: löyly.

Our founder was born in Finland, where this term originates. While it has no direct English translation, the word captures the spirit of the steam rising from the heater and serves as the absolute heart of the experience. Without it? You are essentially just sitting in a hot, dry room.

We hear the question often: “Can I actually throw water on the rocks in a home kit?”

The answer is yes. Please do. Generating that steam is effectively the whole point of the exercise. This represents the biggest difference between traditional heaters and the infrared alternatives you might see advertised. You cannot toss water on infrared panels (they are strictly dry devices), but our heaters are built for exactly that purpose.

The ritual is visceral. You dip the ladle. You cast water onto the rocks.

A loud hiss signals a sudden wave of humidity that rolls over you, instantly intensifying the perceived heat. This burst also releases the natural aromatic oils of the Western Red Cedar or Hemlock walls. It fills the small space with the scent of the forest.

Physically, the steam works to open your pores for a deeper cleanse while soothing respiratory passages. But there is a mental aspect, too. Tending to the steam creates a mindful focus. It forces us to be present. While this sensory immersion is relaxing, it also triggers distinct physiological responses that go far beyond simple sweating.

Health Benefits Specific to High-Heat Therapy

You are triggering physiological responses that only high-temperature environments can provide. When you step inside a traditional sauna, specifically one built from our kits, your heart rate naturally begins to climb. It isn’t just about feeling hot. Your body is actually reacting in a way that mimics moderate exercise.

This cardiovascular conditioning is real. Then there is the sweat.

A real, traditional sauna session induces profound perspiration, the kind that actually drips, which helps flush impurities effectively. We often hear from customers asking if this type of heat is better for stiffness.

Our answer is yes. High ambient temperatures allow for loose, flexible movement while you sit. Unlike the static positioning often required in smaller infrared cabinets, you aren’t stuck in one spot. The deep heat penetrates muscles to soothe joints, alleviating soreness in a way that feels all-encompassing. It surrounds you. And that intense heat cycle releases endorphins for a mental reset that milder heat sources struggle to match.

But there is a practical necessity here. To maintain those higher temperatures, the wood needs to handle the thermal stress without warping or off-gassing. It must be stable. 

Material Quality and Heritage Craftsmanship

That is precisely why we rely on specific timber species like Western Red Cedar.

We have learned a lot since 1974. But the main lesson is simple: you cannot cut corners on lumber when high heat enters the equation.

Woods like Cedar (along with Hemlock and Spruce) possess natural properties that function almost like a built-in defense system. They resist rot. They repel insects. But for the person sitting on the bench, there is a more immediate benefit: these timbers remain comfortable to the touch even when the air inside is scorching. We choose these materials for that resilience. Just as much as their beauty.

Just consider the engineering required here for a moment.

Your sauna cycles from room temperature all the way up to 190°F and then back down again. Repeatedly. Unstable materials tend to snap under that kind of intense thermal pressure.

Our traditional kits are actually designed to breathe. Instead of fighting against humidity fluctuations, the wood expands and contracts naturally. It doesn’t warp or crack. This ensures the structure remains sound for decades. Not just years.

Then there is the matter of insulation. To maintain deep, penetrating heat efficiently, the cabin walls must act as a true thermal barrier (real, solid wood is naturally excellent at this). Compare that to the thin panels or extensive glass walls found in so many modern “aesthetic-first” designs. Do they look nice? Sure. But those materials often let heat escape, forcing the heater to run constantly just to compensate.

Installation and Practicality: What to Expect

That initial hesitation usually evaporates the second you crack open the manual. We know it can look like a big project. But consider our track record: since 1974, we have helped over 65,000 customers navigate this exact journey. The takeaway is simple.

You really do not need to be a professional contractor to build a sanctuary in your own home.

How hard the installation feels depends largely on which kit you pick. If you choose a Pre-cut kit, you are essentially lining a room that you have already framed and insulated. It becomes part of the house structure. A permanent “built-in” feature. Pre-fab modular kits are a different story entirely. These arrive as large, finished panels. You just latch them together. Often, you can have a modular setup ready for use in a single afternoon.

There are some logistics to figure out beforehand, though.

First, power. Unlike lower-power alternatives that might plug into a standard wall socket, a traditional heater packs a punch. It generates substantial heat. This means you need a dedicated 240v hardwired circuit installed by a licensed electrician. No way around that one. Ventilation matters, too. You need proper fresh air intake and exhaust to keep the heater functioning correctly and to ensure the air remains comfortable while you bathe.

We also field a lot of questions about water management.

Homeowners frequently ask if a floor drain is mandatory. For most residential installs, the answer is no. Unless you plan on hosing down the interior like a commercial gym, you are fine without one. A simple waterproof floor (think tile or cement) is sufficient to handle the ladle-fulls of water used during a typical session.

Yes, installing a traditional kit involves more planning than buying a portable unit. We won’t pretend otherwise. However, this upfront work ensures your sauna becomes a lasting fixture rather than a temporary appliance.

Embracing the Authentic Sauna Lifestyle

While plenty of modern alternatives promise convenience, they often miss the actual soul of the experience. The intense heat. The distinct hiss of steam. High-quality cedar. These elements create a ritual that technology just cannot replicate.

Since 1974, we have walked this path with over 65,000 homeowners across North America. We help them build their own serene retreats (and save them money in the process). We know that installing a sauna is about more than just lumber; it is about honoring a timeless culture.

Ready to start your project? You can browse our DIY Home Sauna Kits or reach out directly for custom design assistance. Let’s build something lasting.

'