
Before you install a DIY sauna kit, the room has to be ready for heat, moisture, wiring, ventilation, and daily use. A missed measurement, unclear heater location, forgotten vent, or rushed electrical plan can create problems long before the cedar is installed.
A DIY sauna kit gives you a clearer path through the project, but it does not remove the need for proper preparation. The room still needs to be framed, insulated, wired, and planned in the right order. Once those pieces are in place, the kit materials can do what they are meant to do: turn a prepared space into a finished sauna.
These tips will show you where to slow down, what to check first, and how to avoid the mistakes that are hardest to fix later.
Tip #1: Measure Twice Before Ordering
Your sauna kit should match the room you are actually building. Before ordering, confirm the finished width, depth, and ceiling height.
Measure after framing if possible. Small changes in wall thickness, door placement, or ceiling height can affect cedar quantities, bench layout, heater sizing, and trim.
Check the details that are easy to miss:
- Door location and swing
- Heater wall
- Bench wall
- Windows or glass
- Bulkheads, slopes, or uneven corners
- Areas that need blocking or clearance
A simple sketch and a few photos can help. The more accurate your measurements are, the smoother the installation will be.
Tip #2: Know What Your Sauna Kit Includes
Review your quote and packing list before the build begins. You should know which materials are included, which items are optional, and which parts of the room are still your responsibility.
Most sauna kits focus on the interior sauna materials, such as cedar boards, bench material, trim, vents, vapor barrier, lighting, and accessories. Heaters, controls, doors, framing, insulation, wiring, and labour may be separate depending on the kit.
Compare the kit contents with your room plan before you start. It is easier to catch a missing or misunderstood item before installation than halfway through the project.
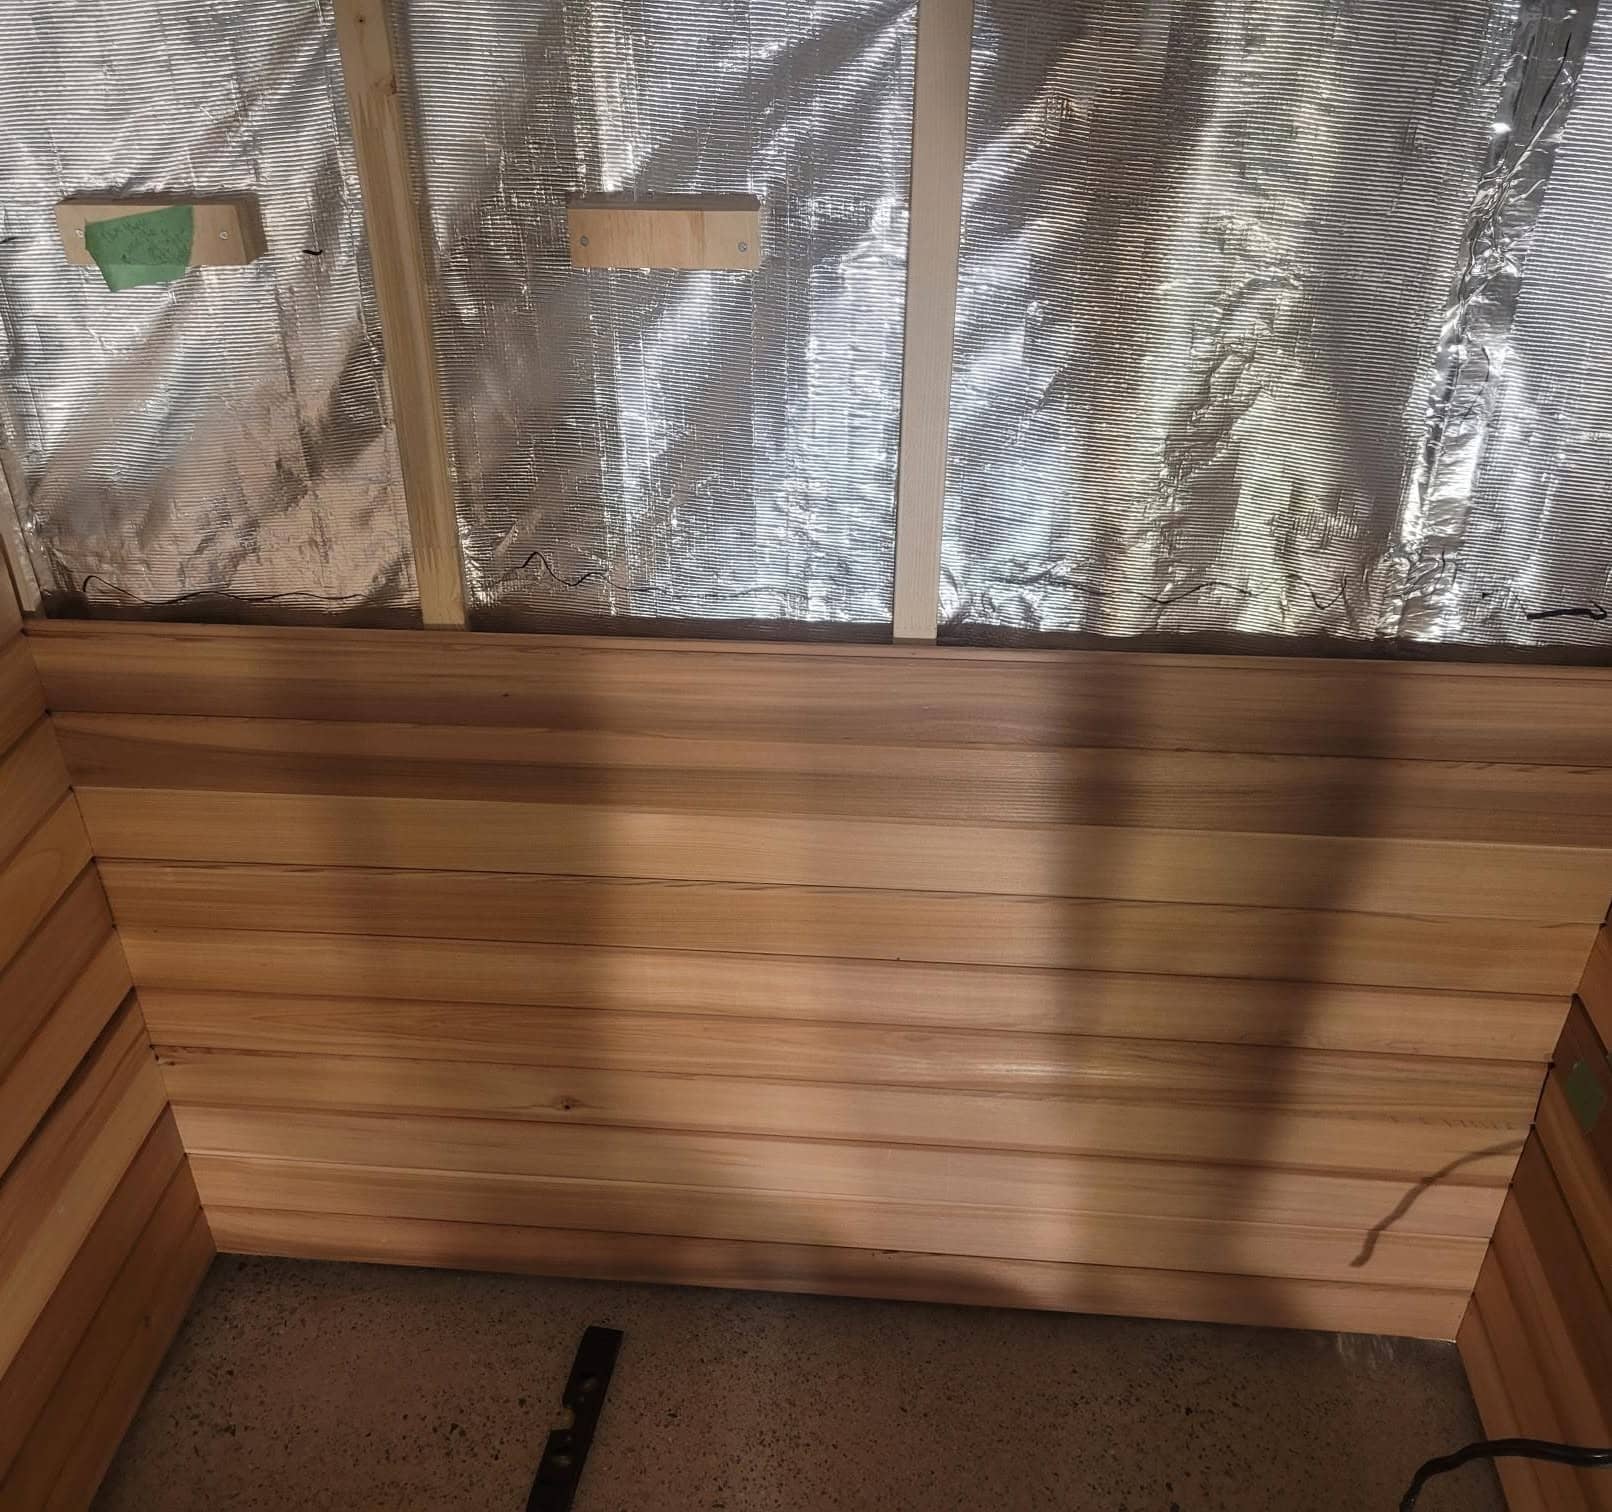
Tip #3: Prepare The Room Before The Cedar Arrives
Before your cedar arrives, the room should be framed, clean, dry, and ready for installation. You do not want to unpack finish materials into a space that still needs major decisions.
Confirm the basics first:
- Square walls
- Final ceiling height
- Door rough opening
- Bench blocking
- Vent locations
- Electrical planning
- Heater placement
- Lighting location
If benches, backrests, heater guards, or accessories need extra support, add blocking before the walls are closed. Once the cedar is on site, you want to be installing, not fixing framing or rethinking the layout.
Tip #4: Plan The Heater And Electrical Work Early
Your heater affects the entire sauna layout. Before the cedar goes up, confirm the heater size, heater location, control placement, wiring path, and required clearances.
Start with the room volume, then account for glass, ceiling height, insulation, and colder surrounding areas. The wrong heater size can lead to slow heat-up times, uneven heat, or poor performance.
Electrical work should be planned before the walls are closed. If you are using an electric heater, involve a licensed electrician where required so the sauna is safe, compliant, and ready for installation.
Tip #5: Install The Vapor Barrier With Care
The vapor barrier is hidden once the cedar goes up, but it plays an important role in the build. It helps manage heat and moisture behind the finished sauna interior.
Install it over the insulated wall and ceiling assembly before the cedar boards go on. Pay close attention to seams, corners, and any openings for vents, lights, controls, or wiring.
Do this step slowly. A clean vapor barrier installation helps the sauna hold heat properly and protects the structure behind the walls.
Tip #6: Think Through Vent Placement Before Closing The Walls
Vent placement is easier to plan before the cedar is installed. Once the walls are closed, moving an intake or exhaust vent becomes much more difficult.
Your vents help bring in fresh air, move heat through the room, and dry the sauna after use. Their location should work with the heater, benches, and overall room layout.
Do not treat ventilation as an afterthought. A sauna can be hot and still feel stale if the air does not move properly.

Tip #7: Take Your Time With The Tongue-And-Groove Boards
The tongue-and-groove boards are the finished surface you will see every time you use the sauna. Install them slowly, keep each course straight, and check alignment as you go.
Work carefully around corners, vents, lights, and the door opening. Dry-fit difficult cuts before fastening, and avoid forcing boards together if something feels off.
This is where patience shows. Clean board lines, tight joints, and careful cuts will make the finished sauna feel much more polished.
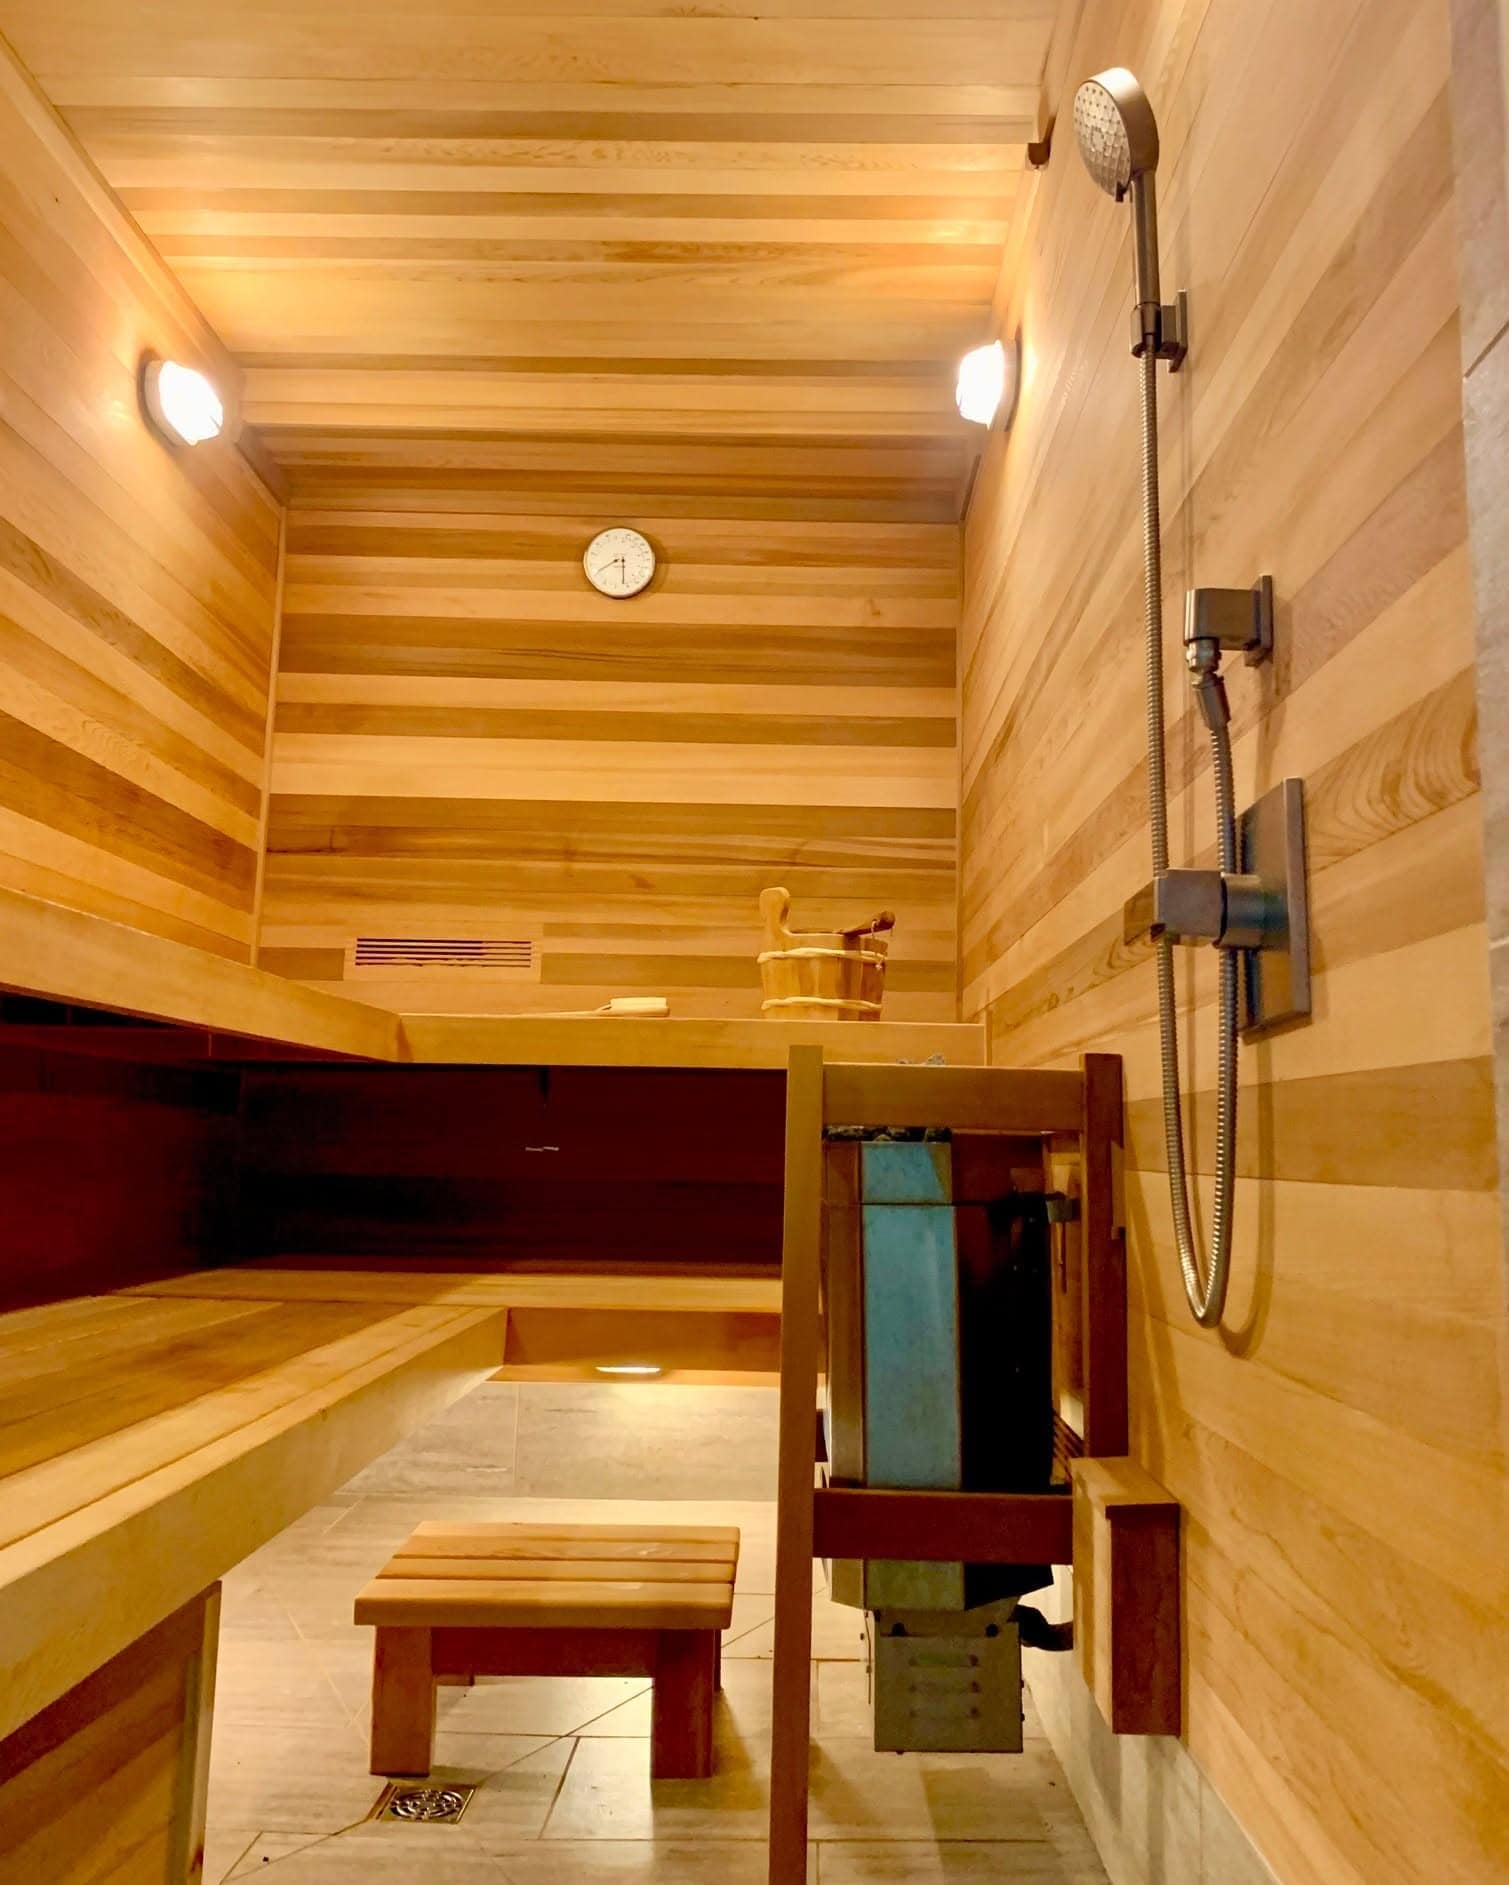
Tip #8: Finish Benches, Door, Trim, And Lighting With Care
The benches, door, trim, and lighting decide how the sauna feels once the main cedar work is done. These details should not be rushed, because they affect comfort, safety, and the final look of the room.
Start with the benches. They should feel solid, smooth, and comfortable, with enough depth to sit properly and enough clearance around the heater. If your layout includes upper and lower benches, make sure the lower level gives you safe access and the upper level places you comfortably in the heat.
The door should fit cleanly and open outward. Its placement should not interfere with benches, heater clearance, or the natural path into the sauna. Trim should cover transitions neatly without looking forced, especially around corners, vents, lights, and the door frame.
Lighting should be simple, sauna-suitable, and placed where it adds comfort without glare. When these finishing details are handled carefully, the sauna feels intentional instead of improvised.
Bonus Tip: Test The Sauna Before Your First Full Session
Before your first full session, run the sauna long enough to confirm that everything works as expected. This is your chance to catch small issues before regular use.
Let the heater come up to temperature, check that the controls respond properly, and watch how the room feels as it warms. The door should open and close cleanly, the benches should feel solid, and the vents should be clear. Pay attention to anything loose, uneven, unusually noisy, or out of place.
Use this final testing checklist:
- Heater turns on and operates correctly
- Controls respond as expected
- Lights work properly
- Door opens outward and closes cleanly
- Benches feel stable
- Vents are open and unobstructed
- Trim, guards, and accessories are secure
- No loose fasteners or sharp edges are exposed
- Room heats evenly
- Sauna dries properly after use
A short test run gives you time to make small adjustments before the sauna becomes part of your regular routine.
Start Your First Sauna Build With The Right Kit
A beginner sauna build is much easier when the materials match the room from the start. Accurate measurements, a prepared space, early heater planning, careful vapor barrier work, proper ventilation, and patient cedar installation all help the project come together cleanly.
At Home Sauna Kits, we build custom DIY sauna kits around the details of your project. Your room dimensions, ceiling height, layout, and heater needs help us match the right sauna-specific materials to your space, including Western Red Cedar interior boards, bench components, trim, vents, vapor barrier, and sauna-rated lighting.
You still need to prepare the room properly, but you do not need to source every sauna component on your own. With the right kit and a clear plan, your first sauna build can feel organized, manageable, and built for years of use.